How to draw a gun. Hello, dear reader! In today’s drawing article we will demonstrate you how to draw a gun. In this lesson is no complex shadows and lines. In this article, we will look at how to draw guns: Glock, Deagle, Revolver. And also learn how to draw a pistol in hand.
So, let’s start the tutorial and learn how to draw a gun for beginners! To draw a cartoon revolver, you will need only a piece of paper and a pencil. You may also wish to acquire an eraser to correct any mistakes, and coloured pencils, crayons, or markers to colour your completed drawing. Pistols are the most common weapons in the world. They are light, and the police can easily carry them with them. Also, they are always the second weapon in special operations. Today we will talk about how to draw a gun.
How to draw a gun easy ( option 1)
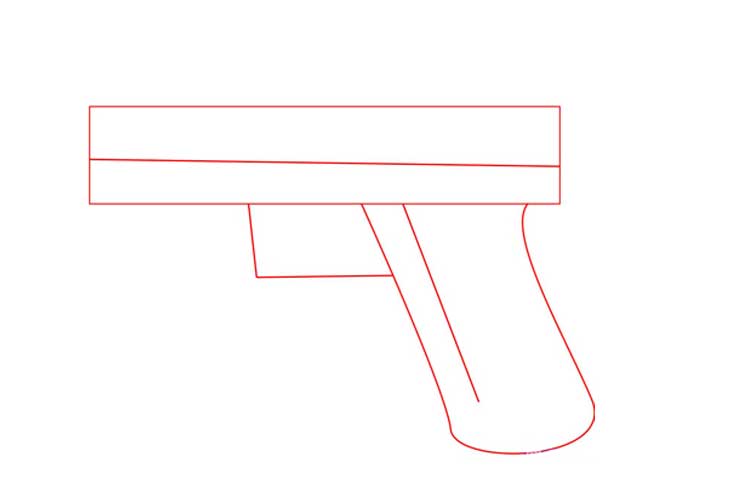
How to draw a gun glock (option 2)

We begin with the American weapons, namely the Glock. In this section, you will learn how to draw a gun in stages. By itself, the design of pistols is not too complicated, but they have a lot of small details that you need to draw.
The first step will be drawing the main parts of our weapons.
We draw the trigger and draw a relief on the handle that does not allow glock to slip out of hand.

On the upper right side, we will depict vertical relief sticks, and they are needed for more convenient charging. Also, we represent the ejector, from which empty shells fly out when fired.

Detailing the lower part.

We are finalising our grip and working on such small details as the front sight, etc.

Now you know how to draw a glock, you have to take a black marker and paint it.


How to draw a gun in hand?
Since you started to draw firearms, then maybe you will have a question about how to draw a pistol in the hand of a soldier, a policeman or someone else. Indeed, it is not too easy, not only for beginners but also for experienced artists.
So, the thumb should lie on top of the handle. Three more fingers go literally down the ladder, and the index finger should be bent on the trigger.
For clarity, in the first picture, we highlighted the handle in green.

The next step will be the detailing of fingers, the handle and the gun itself.

That’s all, use this article as a reference, and you will succeed!


