How to draw a monkey for kids. Hello, dear young artists and welcome to the drawing lesson where we will show you how to draw a monkey for kids. What can be more beautiful than a small and funny monkey? Such a cute monkey we’ll be drawing.
The monkey is a cute animal, known for its funny habits and imitation of people. She lives in warm lands, but in our country, she can be seen in the circus and the zoo. In this lesson, we suggest looking at how to draw a monkey using various and detailed ways that make this process easy but fun.
One of the best ways to explain how to draw a monkey with a pencil. Gradually, this is done in the following way:
How to Draw a Monkey easy ( option 1)
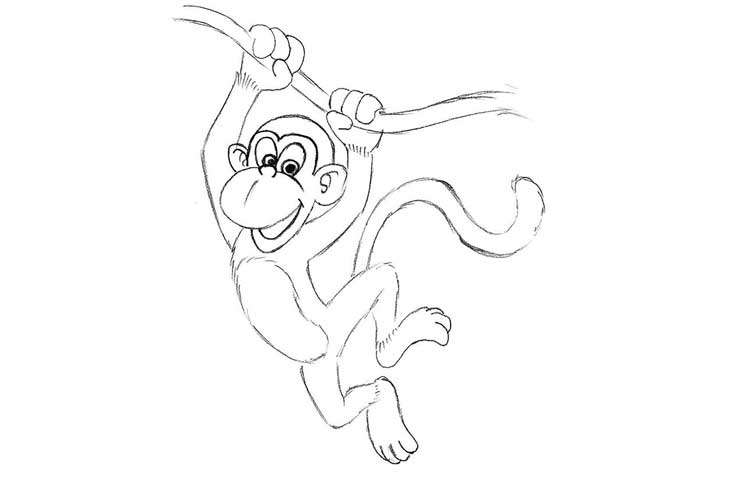
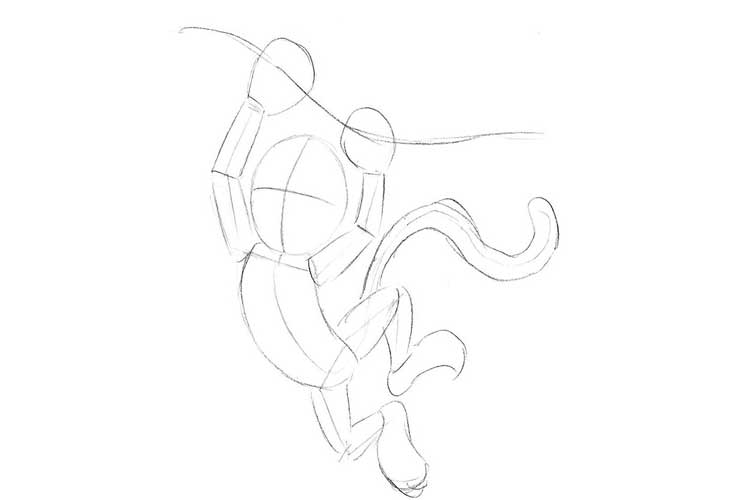
Everyone knows that these animals are unusually agile: jumping and hanging from branch to branch, they move faster than just on the ground. In this example, we will look at how to draw a monkey with a pencil hanging on a branch.
First, prepare a sketch of the figure with simple lines. The circle of the head, front paws – up (in the future they will hold on to the branch), lower paws down and arbitrarily curved tail.

The resulting sketch will add volume, thickening all parts of the body. Line outline branch.
Now you can draw each part in more detail. Let’s start with the head. Let us draw large ears and a bright front part of the muzzle with the nose, as is typical for an animal. The finished head can immediately circle the contour marker.

Draw the hand holding the branch. To do this, first draw the chapter itself, then clasping its fingers.

On the abdomen, draw a bright spot in the form of an elongated circle. Connect the torso and limbs with smoother lines.

It remains to draw the toes, remove the auxiliary lines and the drawing is ready.

How to Draw a Monkey simple (option 2)

The following sequence explains how to draw a monkey in stages, standing on four legs.
Stage 1
Let’s start drawing from the head. The muzzle of these animals resembles the face of a man, with less wool on it. Therefore, we portray the head with this feature.

Stage 2
Next, draw the torso. The monkey’s neck is not very pronounced, it must be reflected in the figure.

Stage 3
We consistently depict the paws: first, the fully visible right ones are designated, then the left front one. The beast stands in such a way that the back left hand is not visible. Immediately draw a long tail.
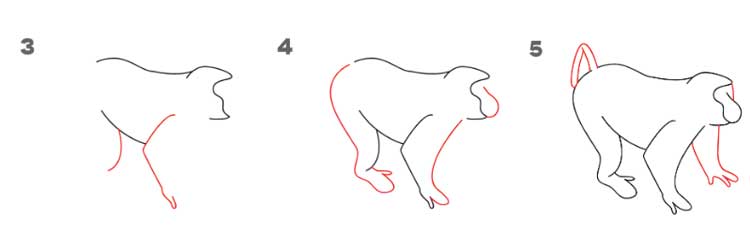
Stage 4
It remains to finish the details: muzzle. We draw long fingers on the paws, not forgetting that the big one is opposed to the rest as in humans.

In the end, the resulting monkey can be filled with colour or shaded, as in our example:

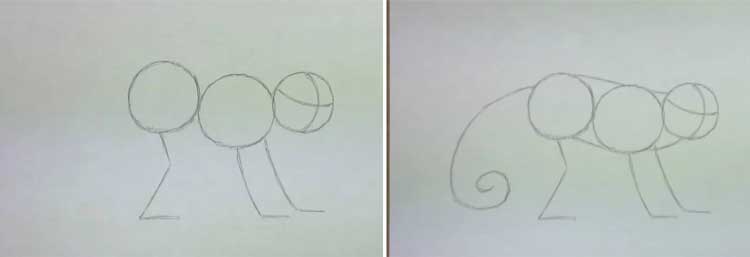
How to draw a monkey ( option 3)
Stage 1: Sketch
A sketch for a monkey consists of three circles, one of which is slightly smaller — the head.

We mark the circle of the head with two perpendiculars. This will make it more convenient to draw a muzzle.
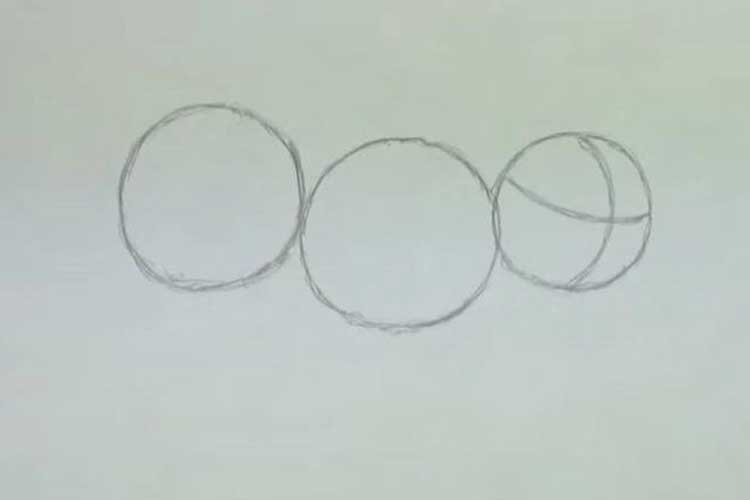
Paws mark about simple lines. Also, note the tail. The sketch is ready.
Stage 2: Detailing
Draw the picture start with the head. At the intersection of perpendiculars, we draw a nose, a little higher symmetrically – the eyes with eyebrows.

The contour of the head is denoted by strokes that imitate short hair.

With the same strokes, we will separate the less hairy part of the face – the face.

We proceed to the refinement of the body. Connect it with the head smooth lines. In the place where the front paws are marked, let’s draw them with more accurate, voluminous ones. The hands of the paws are similar to the brushes of chickens in humans and are resting on the ground in the same way.

Draw the hind legs, slightly bent at the knees.
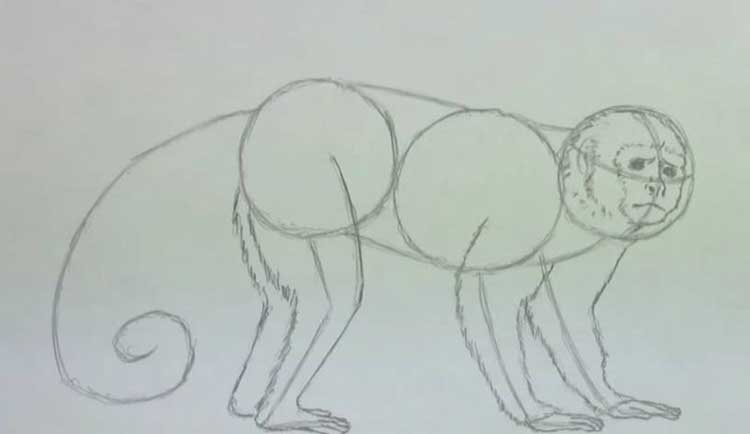
The general outline of the figure is completed with a twisted tail.
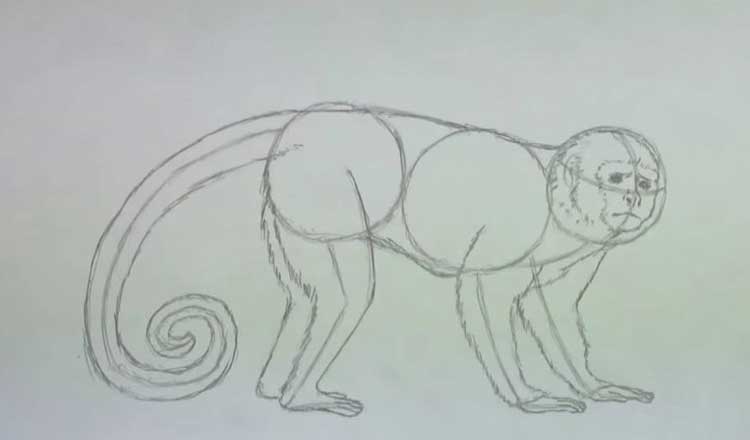
Stage 3: Fill Color
Before shading a monkey, you need to remove auxiliary lines with an eraser.
eleven

First, we shade the shaded parts of the body, and only then – the rest. Strokes should be directed to the expected growth of wool.

The result may be, for example, this:

Funny monkey ( option 4)

In this example, we analyse how to draw a monkey for children, funny and cute.
Let’s start with the muzzle: a horizontally elongated oval jaw. On it, we draw a part of the head with eyes and a nose in a semicircle of smaller diameter. Then we finish the ears and smiling mouth.

Next, go to the torso and legs.

When the preliminary pencil drawing is completed, you can begin to outline the shape with a contour marker. First, we circle the head. Then the front paws, as they are in the foreground. After you can circle the torso, tail and hind legs.

Add a speck on the belly and weed.
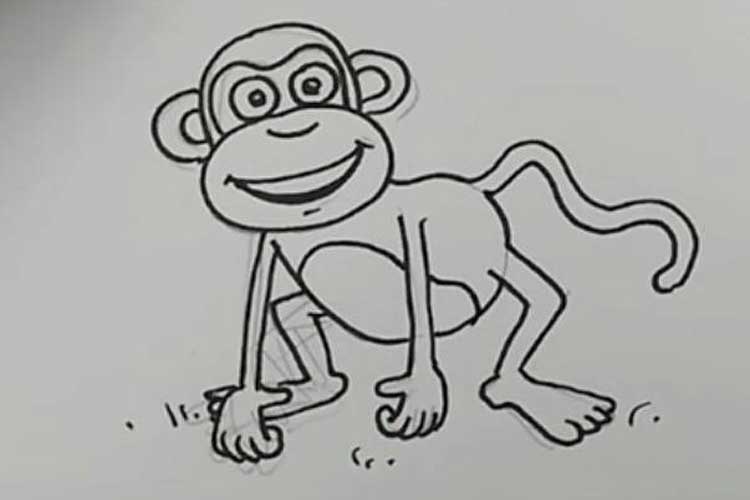
Auxiliary lines are removed with an eraser.

Finished drawing can be coloured.


