How to draw a palm tree? – many novice drawers are asking this question! So, to understand how to draw a palm tree in stages, we need a paper sheet, an eraser, a pencil and coloured markers. This example of drawing is not too complicated and will suit any artist.
Coconuts will grow on our tree. Therefore, we depict a trunk on the top of which three coconuts will hang. From them you need to draw five lines in different directions, in the future they will turn into branches.
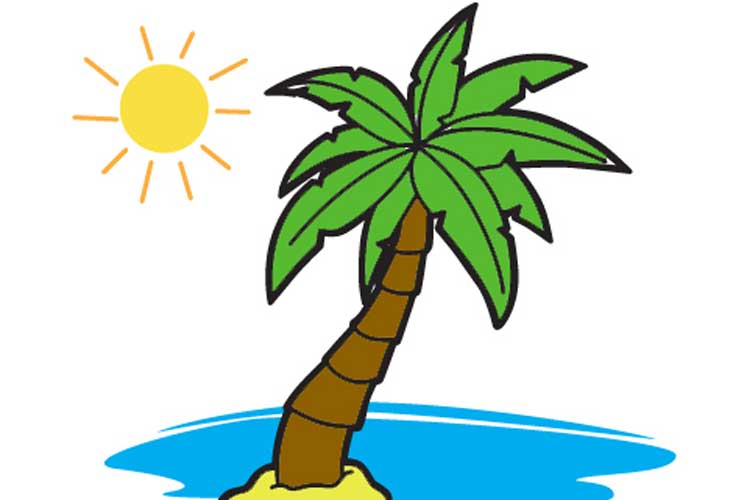
Drawing palm tree easy ( option 1)

Step 1
The first step, as we often do, is to draw the base of the tree!

Step 2
At this important stage, we create the outline of our coconut and the ground beneath our palm tree!

Step 3
Here we draw separate elements on the trunk of the palm tree and the outlines of three nuts on top!

Step 4
On the left, we create the outlines of four palm leaves in the first row!

Step 5
In the same way, only on the right, we create the outlines of only 3 palm leaves in the first row!

Step 6
In the same way, draw one palm leaf on the left side of the second row and three palm leaves on the right side of us, also in the second row of leaves!

Step 7
We begin coloring with the tree trunk, giving it a light brown color, and also coloring the coconut on the ground and part of the ground under the palm tree in gray

Step 8
At this stage, we coloring the palm leaves dark green, starting with the first row and, of course, the grass under our palm tree!

Step 9
Next, coloring the second row of palm leaves!

Step 10
And at your request, we create a beautiful bright blue background for our palm tree!
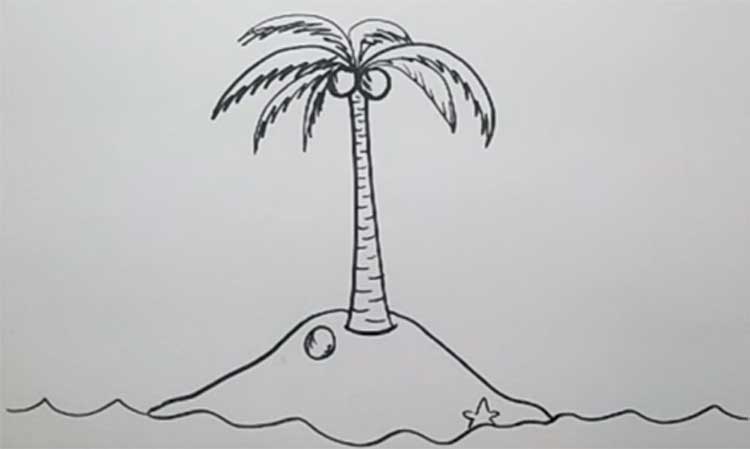
An easy way drawing palm for kids (option 2)
This example is the most detailed in this article as it is designed for beginners. In 8 steps you will learn how to draw a palm tree for beginners.
The first step will be drawing a few lines as in the picture below.

Based on the resulting outline we will draw five sheets.

To make our palm tree look lusher in the background between the leaves, we will draw four more branches.

We depict the trunk, which should look like it was assembled from cubes. From the bottom they are larger and closer to the top, respectively, decrease. Also, don’t forget the ground below.
 This step is quite remarkable. It is necessary to cut out triangles from foliage to make real palm leaves.

Everything is ready; it remains to take the coloured markers and paint our small landscape.

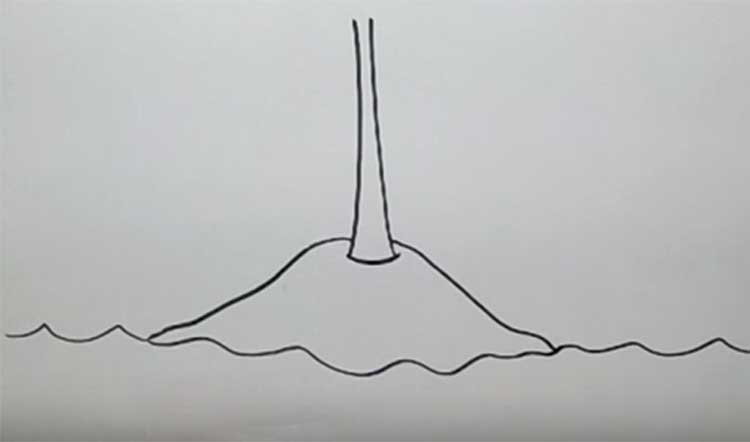
How to draw a palm on the island (option 3)
There are two of the most famous landscapes, either the coast or the island. And now we will look at how to draw a palm tree on an island. Of course, they can grow to the depths of the mainland, but this option is much more popular.
As usual, the first thing we have to portray is the trunk of our palm.

Now we will work on the island in the open sea. We depict the beach in the form of a small mound, which will rise above the water. Then paint on the waves.
We draw bark with thin strokes. Closer to the base the strokes are longer and closer to the end is shorter. Also, add two small coconuts.

Foliage is drawn in the standard way. First, we draw a smooth line that leans slightly towards the ground, and below we make acute strokes.

In the same way, we add some more branches.

To add atmospheric to our picture, you can paint a starfish and a shell on the beach.


