Balloon Drawing in 3 versions will be described in this article! The first balls made of vulcanized rubber, that is, increased strength were presented in 1847 by J.G. Ingram in London. They were already closer to what we are used to seeing. In 1889, the balls came from Europe to the United States.
They cost 4 cents per piece. And in 1907, in Ohio, the Rubber Company began making balls on its own. Already in 1912, the company’s assortment expanded, they began to produce oblong balls. At the beginning of the 20th century, rubber balls became very popular and were used during city holidays. Due to the gas inside them soared above the ground, which conquered people and caused sincere delight.
Balloon Drawing in this is a simple lesson, but follow our recommendations! Until 1922, the balloons were filled with hydrogen. They flew as well as those that are now filled with helium. The problem was, hydrogen is explosive. And in 1922, at a city festival in New York, USA, decorated with balloons, some unknown person set off an explosion.
Because of him, people and a significant official suffered, to which the law enforcement agencies promptly responded. It was forbidden to fill the balls with hydrogen. It was replaced by helium, which is still used for these purposes. It is safe and non-flammable under any conditions.
Let’s find out Balloon Drawing with a pencil step by step
Balloon Drawing for Easy (option 1)

Step 1
Let’s start our drawing with the central element—this will be our one balloon!

Step 2
Next, draw the outlines of the two bottom balloons!

Step 3
And in this step, let’s draw some pretty strings on our balloons!

Step 4
And now we’re creating the outline of the bow in our drawing!

Step 5
Let’s draw the sides and bottom of the bow!

Step 6
Let’s darken the bottom part of the bow on our balloon drawing!

Step 7
Next, draw the outlines of some pretty ribbons around the bow!

Step 8
In this step, we draw a beautiful smile on the top ball!

Step 9
Let’s draw a winking eye and a regular eye on our drawing!

Step 10
And in this step, we’ll just color the balloons in bright colors!

Step 11
And we finish the drawing by shading the bow itself in light gray tones!
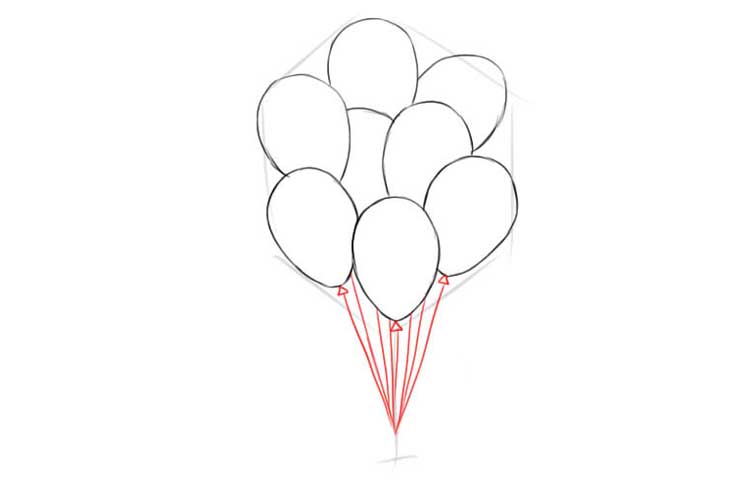
Balloon Drawing for Kids (option 2)

Before drawing any object, still life, or portrait, it is recommended to mark out the sheet. You have to imagine the object’s size, its proportions and fit it all onto the sheet. I mark out the sheet-like this before drawing the balls.

I start drawing balls from the bottom of the bunch. I draw three at once – one in the middle and two on the sides.

Draw five more balls in the upper part of the figure so that they are inscribed in it. The main lines can first be drawn with very light strokes and then outlined with already confident lines, so your drawing will look neat and beautiful.

Now we need to draw the threads from the balls, we draw eight balls, so there will be eight threads.
Let’s add a beautiful bow at the bottom so that our drawn balls look entirely festive.
Let’s color the balls that we drew. Choose the brightest colors; then it will all look very cool.
Here’s a drawing, in the end, we got it. If you liked drawing balls in pencil in stages with me, I recommend trying other lessons.


