Cherry Drawing in 4 versions will be described in this article! Cherry trees grow in almost all corners of the world and attract not only by the opportunity to harvest tasty and healthy fruits but also to enjoy the extraordinary beauty of the plants during their flowering period. In Asian countries, for example, in addition to ordinary cherries, many ornamental plants called sakura grows.
In late March-early April, they turn cities into a white and pink blooming splendour, which attracts millions of tourists to admire. It is straightforward to draw a cherry; the main thing is to follow our steps! In Japan, there is even a unique expression “o-hanami”, which denotes the tradition of admiring cherry blossoms. Recently, more and more ornamental cherry trees appear in other countries of the world. For example, in Copenhagen, Prague, New York, there are already large parks almost entirely planted with these trees.
Interestingly, in English, cherry and sweet cherry have the same name “cherry”. And for clarification, they usually use words describing the taste of the fruit: “sour” (sour – refers to cherries) and “sweet” (sweet – refers to cherries).
So let’s get started drawing a lovely and cute cherry right away!
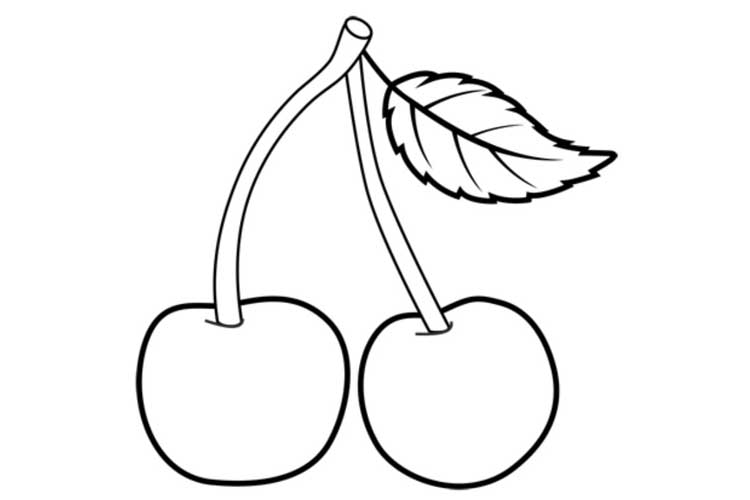
Cherry Drawing Easy (option 1)

Let’s start with cutting.

Then we draw the first berry. Its shape is a bit like a rounded heart.

Add the rest of the berries.

Now draw a leaf, it is slightly curved at the edges.

Now let’s move on to colour. We start with red and burgundy colours. We mark the flare, do not paint over it.

Add volume in the form of shadows and a drop shadow with black colour.

We do the same with the rest of the berries.

Now let’s colour the stem and leaf green.

Add shadows with a dark green pencil.

Add some shadows to the leaf with black and paint the edges of the highlights with white.

The work is ready!
Cherry Drawing blossoms Simple (option 2)

1 – In the cherry case, we skip the sketching step and draw two cherries first.


2 – Next, add two branches.


3 – And we add a leaf to these branches.


4 – Amazingly simple and effective! You just drew a cherry.
5 – It remains only to colour it.
After learning how to draw a cherry, you can go to the store, buy one and recharge with health and anti-ageing vitamins.
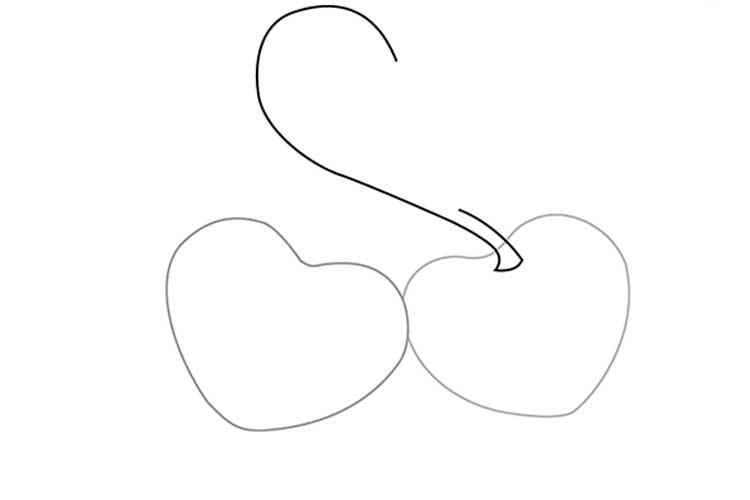
Cherry Drawing Blossom Step by Step (option 3)

We draw the cherry, which is on the right, its shape will be in the form of a heart, only with smoother lines and tilted to the left.

Draw a second cherry to the left of the one drawn; the slope will be towards it.

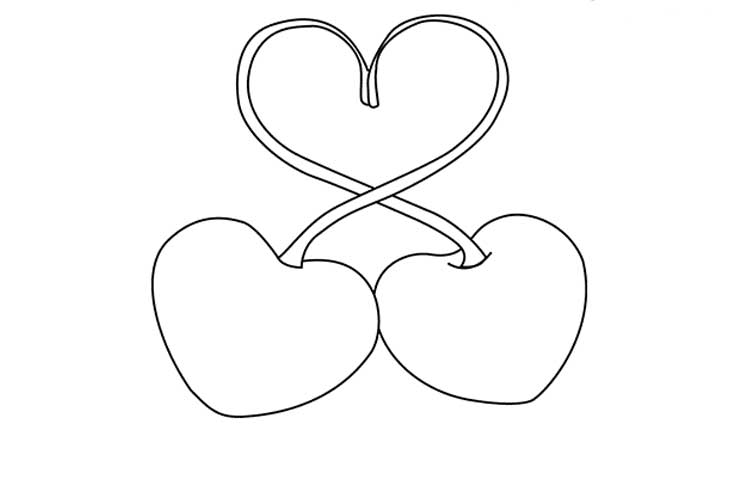
Now draw a half heart curve.
Then the second half, the beginning of which will already be with another cherry.

We finish drawing to add volume.

Erase the intersections and a loving pair of two cherries is ready, you can write something like “Our hearts are always together” or something similar.

Cherry Drawing Blossoms (option 4)

1 Base
The shape of the fruit is voluminous, spherical. First, draw a horizontally elongated oval just below the centre.

2
Volume
To get a juicy fruit, it needs to be given volume.

This can only be done with additional details.

3
The upper part of the fruit
The berry expands from above and resembles a heart shape.

4
Connect the contours
Erase different shapes inside the line. We direct the contour.

5
Dimple
You need to make room for the stalk. It is enough to erase part of the line at the line between the right and left spherical part of the cherry.

6-Then connect them with a smooth bend.

6
Peduncle
Draw the cherry ponytail in a curved line.
Stem We give it the correct shape.

Stem
This is what will immediately happen to those who grow aloe at home. Read soon!

7
Details
To make the fruit look more realistic, convey volume with a small stroke.

Bend: Erase the intersection inside the stem.

8
Leaflet
Draw a base – a vein through which nutrients enter the leaf.

Add sheet details on both sides of this line.

Draw short veins from the mainline.

9
Final touches
It remains to add glare of light, shade the volume and roughen the stalk. The drawing is ready!

10
Colouring
The cherry can be coloured with crayons, paints or felt-tip pens.
Colouring
Choose how you want to paint.


