How to draw a triquetra will be considered in this article in 2 versions! The triquetra symbol is an old surface pattern, a lot of commonly located in Celtic Knotwork Art. It’s an equal sign based upon three interlaced arcs and also is also referred to as a trinity knot.
On a side note, you might have noticed that the triquetra is seen in the center of a trefoil, and if so you’re not going to be very surprised to hear that the easiest means of handling a triquetra is almost the same as the method of drawing a trefoil using a triangle.
Important note: if you want to draw using a compass, it will not be a triquetra (I tested it myself with a compass and couldn’t draw the center because it was too small)! You need to draw freehand because the arc will not be even! An example of a triquetra is on the right side of the hand, and a non-tricuer is drawn using a compass on the left! Otherwise, the triquetra will be extremely complicated.

Despite it traditionally has no actual meaning, many individuals give it value as well as think it represents (to name a few beliefs).There are numerous strategies for attracting a triquetra as well as this takes place to be my favourite one.
This method does take the longest out of all that I have personally tried, as it takes quite a bit of drafting. However it is additionally one of the most accurate and also the most fun for a geometry nerd such as your own absolutely! Follow my channel to see the dots and also freehand techniques coming quickly!
Here’s a simple way to draw this difficult design:
Drawing a Triquetra easy (1 option)

Step 1
This is a very difficult drawing because much of it will have to be done by hand (without using a compass)! To simplify the drawing, we will use the center of an A4 sheet of paper!

Step 2
The central point a4 is important because it is a kind of “coordinate system” that simplifies drawing!

Step 3
In this step, we create a triangle!

Step 4
Draw this triangle with the dimensions shown in the figure!

Step 5
At this stage, we take the center point of the triangle, which is marked with a cross! And we draw the first arc ONLY BY HAND (I tried using a compass, but it didn’t work, only by hand)!

Step 6
This central point of the triangle will have the following dimensions in centimeters!

Step 7
In the same way, starting from the center point and knowing its dimensions in centimeters, we draw two more arcs by hand!

Step 8
And this picture serves as a reminder of the dimensions of the central point in centimeters, since without it, it is practically impossible to draw these three arcs by hand!

Step 9
And here we draw the elements of the inner part of the arcs of the triquetra!

Step 10
The distance between all arc elements is approximately 1.3 centimeters!

Step 11
And now we draw the following elements of the triquetra step by step as shown in the picture!

Step 12
We are now completely finished drawing the lower right arc of the triquetra!

Step 13
In the same way, draw the remaining two arcs of the triangle, the upper and lower right parts!

Step 14
In this step, we erase the elements of the auxiliary triangle and parts of the arc elements!

Step 15
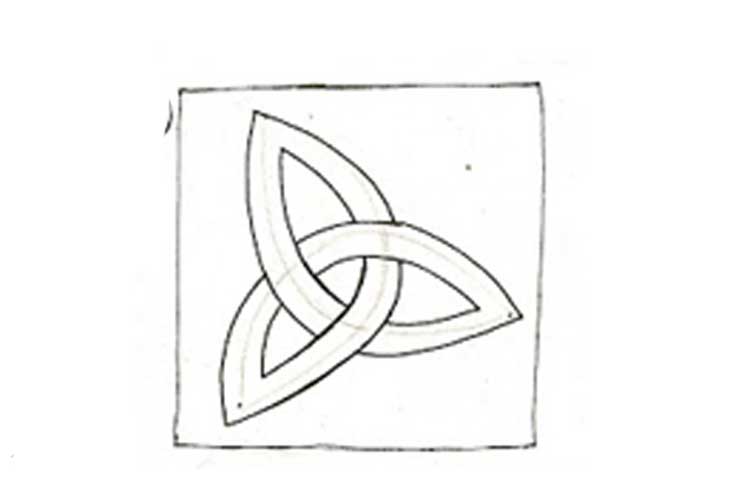
In total, we should end up with this triangle pattern!

Step 16
And here we simply color our drawing in red tones!
Drawing a Triquetra semi-version (2 option)
Step 1

Step 2

Step 3

Step 4

Step 5

Step 6

Step 7

Step 8