How to draw a cube in two different versions will be discussed in this lesson! A cube is a geometric body formed by the intersection of planes. Its shape is formed by squares of faces that converge at right angles to each other. Edge edges, respectively, also converge at right angles.
Having understood the structure of this simple form, you can try to go to the picture.We see a cube on the one hand, and therefore the question arises involuntarily, whether it is possible to start drawing it that way. Drawing a cube is best to start with horizontal lines!
But an attempt to draw only visible edges immediately shows the artist that the drawing is unconvincing. But the fact is that he draws only the visible part of the form, without recreating on paper its actual structure, or, in other words, its construction. How to draw a cube with this question many beginners ask! What will be the structure in a cube?
The boundaries of the faces that define the main features of the form, more precisely, the intersection of the faces, forming the edges of the cube. Thus, the edges represent the basis of the whole cube structure, and therefore it is from them that the drawing of its shape begins.
How to draw a cube with a pencil on paper (option 1)

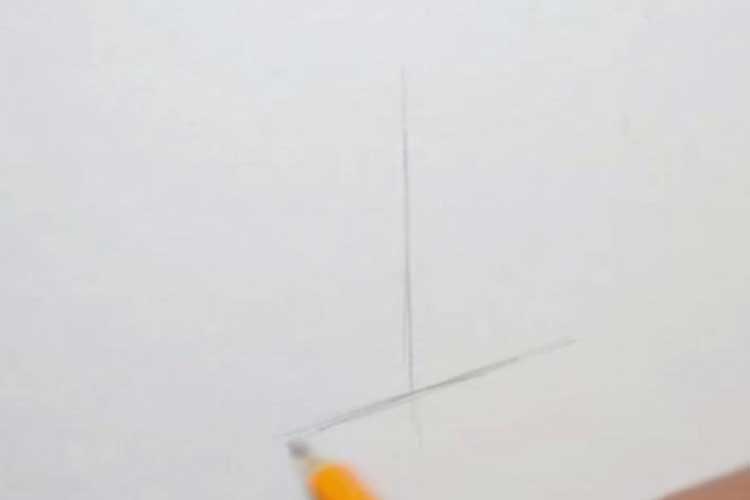
Step 1
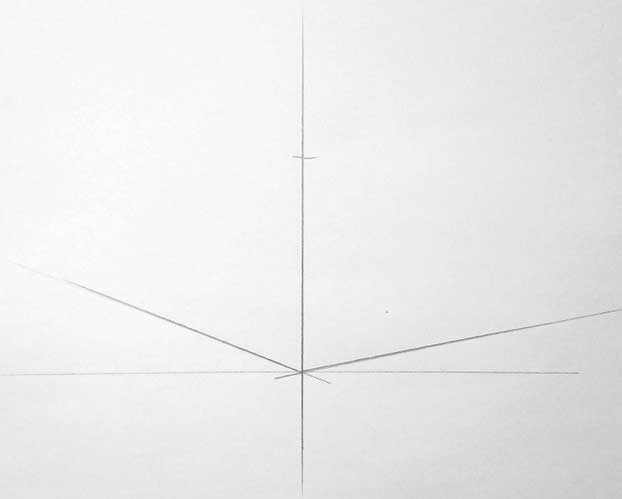
In this tutorial, we will show you how to draw a cube step by step. To begin with, we draw two perpendicular lines.
Draw a cube on paper
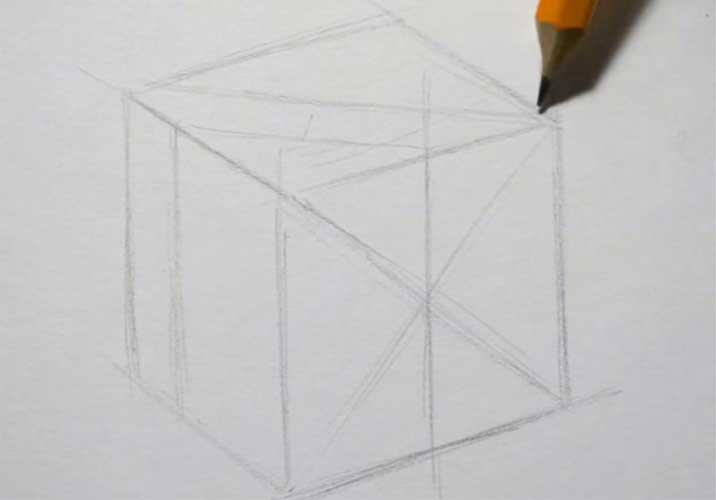
Step 2
Further, so that our perpendicular serves as the center to one of the faces of the cube, we draw a diagonal to opposite sides of the face. Then we draw up two vertical straight lines, as shown in the figure.

Step 3
We draw the second diagonal with one intersection point. We spend the upper part of the cube face.

Step 4
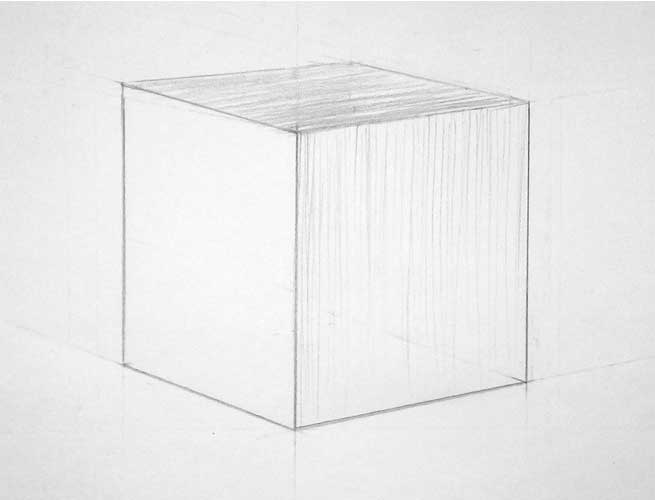
The next step is to make a projection of two faces of the cube that is visible at an angle.
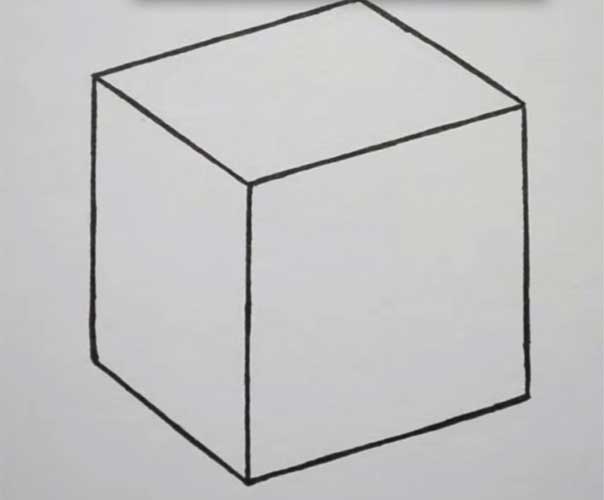
Step 5
Draw contours with a marker or ink.
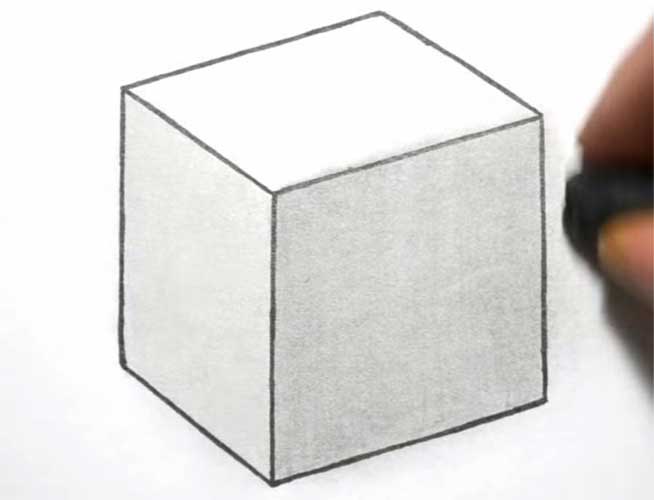
Step 6
Shade the side faces.
Step 7
Next, draw a shadow that falls from the cube. That’s all! We are right
Drawing a cube 3d (option 2)
A cube is a geometric body formed by the intersection of planes. And, like any three-dimensional object, when depicted on a flat sheet, it will change following the laws of perspective.
The figure shows the horizon line is the level of the plane of view of the artist. There are vanishing points of parallel lines. In our case – these are four horizontal lines, tending to the vanishing point on the left and four horizontal lines, tending to the vanishing end on the right.Image of the cube in perspective to the horizon line Picture of the cube in view to the horizon line

We depict objects in space as our eye perceives them. (The farther away from the viewer, the smaller the subject, etc.) The beginning of any painting is a composition. Light lines mark our subject on the sheet.
Above there should always be a little more space from the edge than the bottom. Intuitively define the scale so that the object does not look gigantic or too small. Draw the nearest vertical edge of the cube
Draw the most adjacent vertical side of the cube
Position the nearest vertical edge so that it does not coincide with the center of the sheet, passing through the intersection of its diagonals. We mark the height by notches, this is the highest edge in our image, as it is the closest to the viewer.
On the eye, we determine the angle of inclination of the ribs lying on the table relative to the horizontal. Train your visual memory by memorizing the corner. Glance translate them to the cube, then to the picture.

Image of cube top edges
We will do the same with the upper ribs. How to transfer space on a sheet to us explain the fundamental laws of linear perspective. All parallel lines merge to the horizon line at a single point. Therefore, to convey that the edge is farther from the viewer, we will depict it less and position it higher. Thus, all the tips will be of different heights.
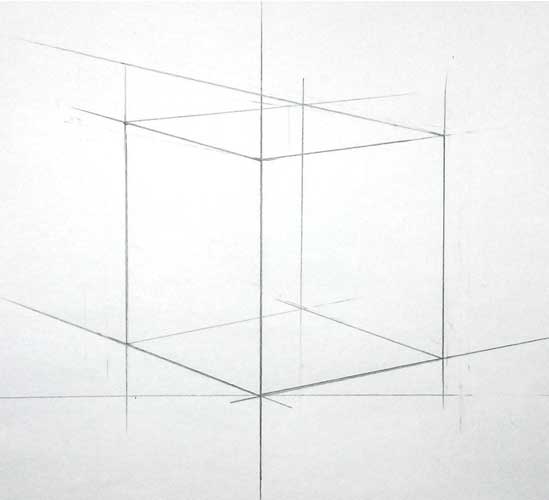
The intersection of the far horizontal edges of the cube
The junction of the now flat sides of the cube At the intersection of the far parallel corners formed vertices. Through them passes the farthest corner invisible to the eye. At the initial stage, we will depict a cube transparent for understanding the complete construction of the object.
To find out how much the side faces have been reduced, let’s use the sighting method. With the help of this method, the perception of the outlines of the object occurs, the artist learns to depict objects in proportional and in different angles.
How does he work? Take a pencil on an outstretched arm, close one eye, align the pen and the image of the edge of the cube in space. The upper side of the pencil should coincide with the top vertex of the edge, and with your finger, pinch the point on the pen that coincides with the lower vertex. Without removing your finger from the pen, turn it at a right angle and measure the distance between the two edges.
Thus, we will see the ratio of the height and width of one face. Remember this relationship and pass it on. This method can be measured and depicted as the ratio of the edges.
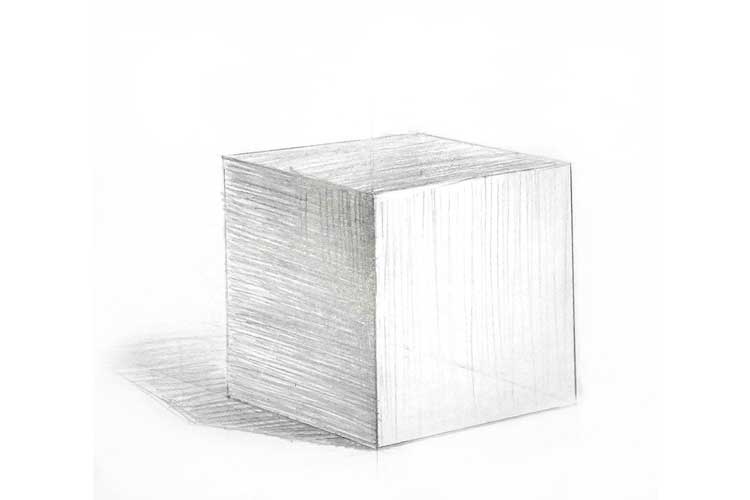
After the linear constructions are completed, we proceed to the aerial perspective, which means shading.
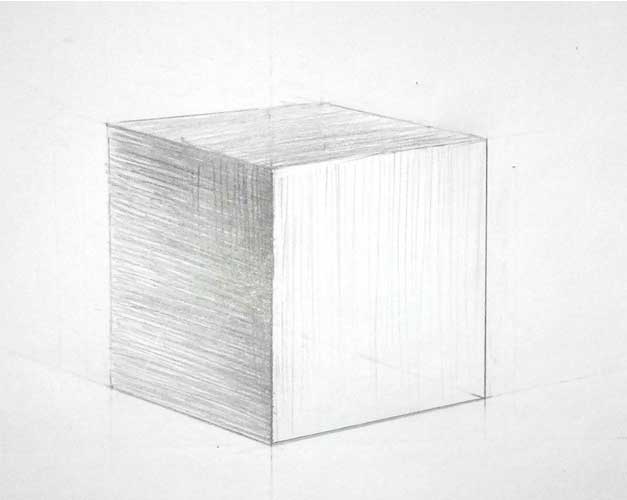
The main task of the artist to transfer three-dimensional forms of objects. In our cube, we see three faces; all of them are different in tone. The left side is the darkest – it is the object’s own shadow. Due to reflected light from surrounding objects or reflexes, we make the shading a little lighter as we move further to the left. The most significant edge is made more contrast than all the others. Thus, it shows its proximity to the fore.
Aerial perspective and cube hatching
Atmospheric perspective and cube hatching
The upper plane is darker than the vertical on the right. The light on it only slips, forming a semitone. Note that the closer to the light source, the brighter the tone will be. Shading can be applied diagonally. On the edge of the eraser will highlight to convey the highlight.
To work on the lightest edge, take a robust pencil H or 2H. It will not make the tone too dark. Shading put vertical, in the direction of the plane.
Drop shadows and cube own shadow
Drop shadows are always darker than the object’s own shadow. The rear edge is the line of transition between light and shadow. From it begins a falling shadow. The closer to the subject, the more vibrant the tone.
The reflected light from the cube creates a reflex inside the shadow, and it is slightly highlighted.
Cube drawing according to the laws of perspective construction and aerial perspective

Cube drawing according to the rules of perspective construction and aerial perspective


