How to draw a pineapple in 2 different options will be described and shown in this article! In this lesson, you will learn how to draw a pineapple in stages with a pencil. To draw a pineapple, we need nothing at all – paper, pencil, pen or paint, a little time and patience.
To begin with, let’s draw a pineapple shape – a rough, elongated oval and the upper part, where the leaves will be. Pineapple is an exotic fruit of a herbaceous plant with a no less unusual appearance. It has a bright characteristic taste and aroma; its flesh is extremely useful.
In this tutorial, we will explain how to draw a pineapple. Below are the various options: pencil and felt-tip pens, more complex and simple for children. Drawing a pineapple is an engaging and straightforward activity; the main thing is to follow our recommendations!
Pineapple drawing (option 1)
Step 1
The first step is to draw a circle that is elongated vertically—this will be the outline of the juicy pineapple flesh!

Step 2
Here we draw five arcs at the bottom of the fruit, which will give us the outline of the veins!

Step 3
In the same way, we draw 9 arcs in the middle of the circle!

Step 4
Next, draw similar shapes at the top of the pineapple!

Step 5
Finish drawing the pineapple’s curves and draw three small leaves at the very top!

Step 6
We begin to darken the inner parts of the arcs at the bottom of the pineapple, as shown in the picture!

Step 7
We darken the top of the pineapple in the same way!

Step 8
At this stage, we continue drawing leaves for our juicy pineapple, or more precisely, we draw the next 3 rows!

Step 9
Draw the next 4 rows of leaves in the same way!

Step 10
And we finish drawing the leaves with the top row!

Step 11
Let’s color all the leaves green!

Step 12
And finish coloring the fruit in light brown! That’s it, the pineapple is done!
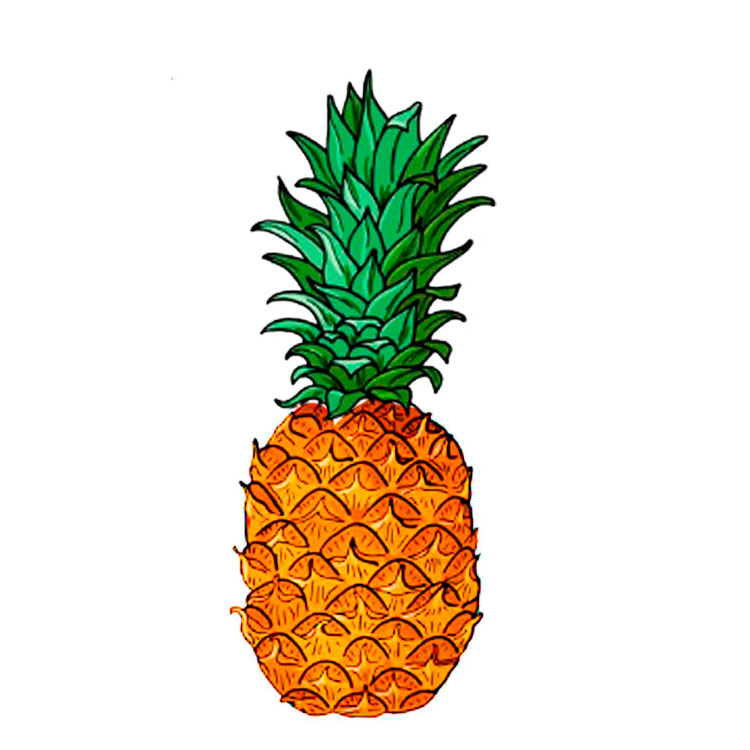
Drawing pineapple realistic example (option 2)

A very nice and useful way to draw a pineapple with a pencil is suggested in this sequence. It is somewhat more complicated than the others, but the fruit will be very realistic, like a real one.
First, prepare a sketch. It looks like a vertical rectangle, divided into eight parts. The upper half will be the leaves; the lower half will be the pineapple itself. The primary markup is specified as shown in the second figure.

Next, the grassy part is filled with individual leaves, and the fruit takes on a characteristic scaly look. The outline is also contoured accordingly. Auxiliary lines can be removed with an eraser and then correct the main ones.


At the very end, shadows are added using shading.


