How to Draw a Tank in 2 variants will be described in this article! In modern warfare, tanks are one of the main types of combat vehicles, and until recently, they were the most common mechanized weapon on the planet. But how did people even come up with the idea of climbing into a huge metal box on tracks and going off to kill each other? Let’s try to figure it out.
The idea of creating mobile fortresses has been present in people’s minds since the first mass wars. First, there were chariots, then elephant-mounted battle towers, and later came the famous Wagenburgs, effectively used in the Hussite Wars. But all these carts were pulled by horses or elephants, which were extremely vulnerable and unpredictable.
Even back then, people began to consider self-propelled fire fortifications, and the famous Renaissance inventor Leonardo da Vinci couldn’t ignore the idea either. He designed a machine made of wood and steel, propelled by human power. It looked like a mushroom cap bristling with cannons. Of course, such a thing was impossible to create with 15th-century technology, and the project remained merely a fantasy. Incidentally, in 2009, American engineers did create a working Leonardo da Vinci tank for a popular science film.
Drawing a tank is no easy task, but we’ll show you a step-by-step guide to drawing one with minimal effort! The next stage, preceding the advent of tanks, was the tracked armored train of the Frenchman Édouard Bouillen. In 1874, he proposed placing several interconnected cars not on rails but on a common track, arming this monster with guns and providing it with a crew of 200. Although the project was rejected, the author himself believed that his invention would change the course of war. This happened later, though not with his combat vehicle.
With the advent of the first automobiles, the idea of using them in war became obvious to everyone. Therefore, even before World War I, almost all the armies of the leading powers had their own fleets of armored cars, and real armored trains were also in use. The disadvantages of these combat vehicles were natural. Armored cars are unable to navigate rough terrain or overcome obstacles and trenches, while armored trains are tied to rails. Therefore, when, during protracted battles, the armies of the opposing countries increasingly began to dig in, constructing kilometers-long anti-personnel barriers of mines and barbed wire, and using machine guns and shrapnel shells that literally mowed down advancing infantry, engineers realized something had to be done.
When, in 1915, British Colonel Ernest Swinton proposed using an armored vehicle on a tracked tractor chassis to cross trenches, Winston Churchill seized on the idea and created the Landships Committee, which urgently began research.
So let’s get started on drawing the tank right now!
How to Draw a Tank Easy (option 1)

Step 1
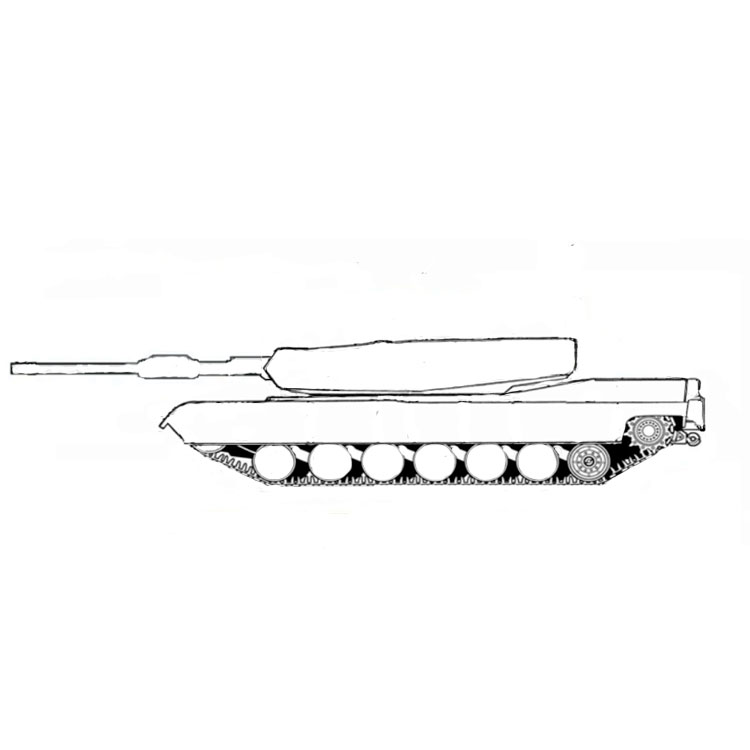
To successfully draw an Abrams tank, the first step is to draw a horizontal line!

Step 2
Next, we draw the outline of the upper part of the frame above the tank’s tracks!

Step 3
And in this step, we’ll sketch the outline of the tank’s rear hull!
Step 4
Here we are building the central turret section of our combat vehicle!
Step 5
And at this stage, we’re creating the outline of the Abrams tank’s muzzle!
Step 6
Let’s sketch out the tracks and outline the circles—the tank’s road wheels!
Step 7
Next, we’ll draw the rear of the tank—this is where the drive sprockets in the tank’s track system are located
Step 8
Let’s add detail and darken the “wheels”—or, to be more precise, the tank’s tracks!

Step 9
We’ll add detail to the central part of the tank in the same way—specifically, its hull!

Step 10
At this important stage of the drawing, we’ll also add detail to the front of the tank (its gun barrel and front armor)!
Step 11
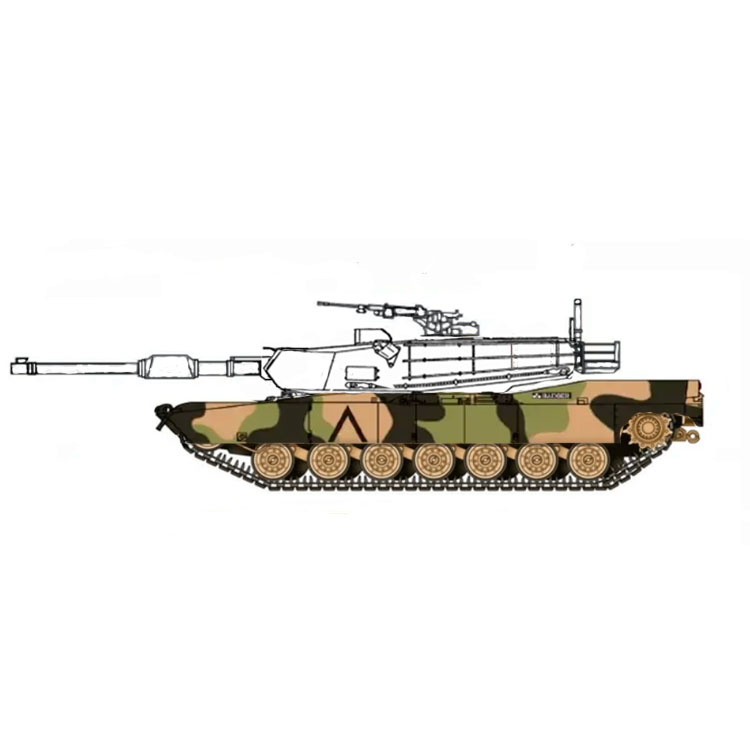
In most cases, we depict the large-caliber 12.7-mm M2HB Browning machine gun mounted on a tank turret!

Step 12
In the same way, we draw the so-called “tube”; in most cases, this is a snorkel (OPVT)—an external tube used to wade through water obstacles!

Step 13
Let’s start coloring the lower part of the tank in various bright colors!
Step 14
And now we’re finishing up by painting our favorite Abrams tank in camouflage colors!
How to Draw a Tank Easy (Option 2)

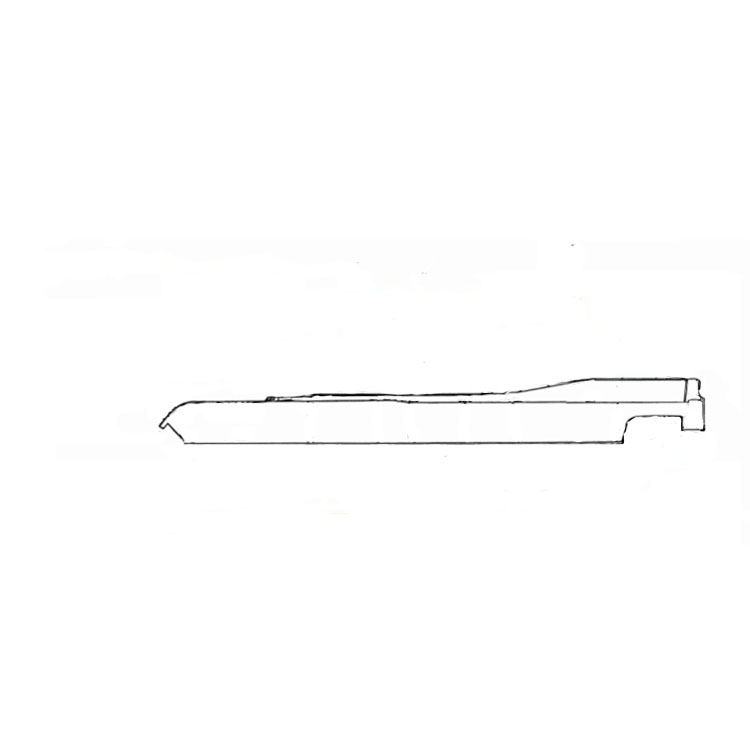
Step 1
The layout of the drawing of the tank.
You can appropriately attract a storage tank if you do it detailed, preferably complying with the recommended drawing format plan. Split the sheet into eight squares; they will undoubtedly assist you in correctly making the initial outlines.

Step 2
Draw the base for the tracks and also the hull.
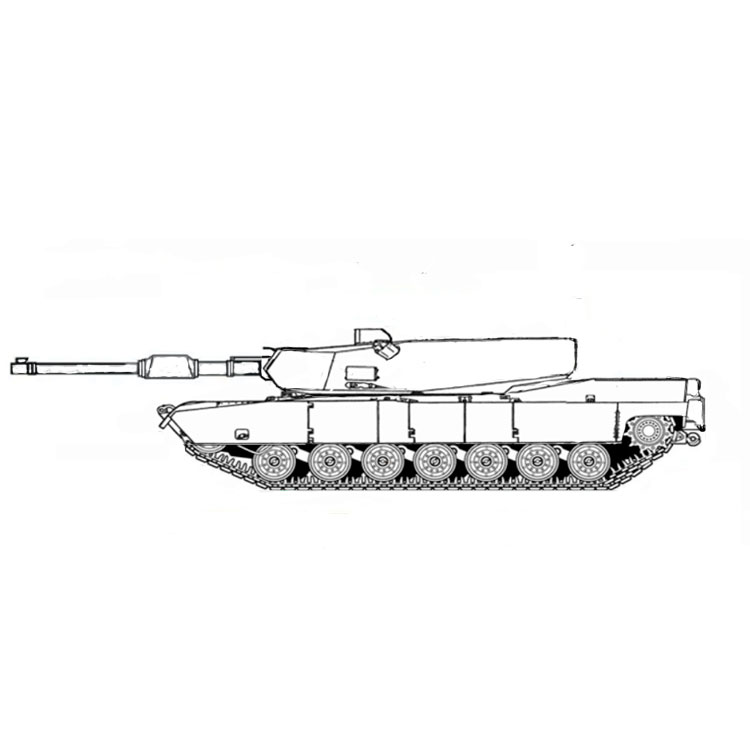
Draw the basic outline of the storage tank’s tracks and the hull. Divide out the location where the track wheels will undoubtedly be positioned. This line for the facility wheel will certainly help correctly draw all five reels of the same dimension. Compute the width of the tracks and attract their summary on the front of the tank hull.

Step 3
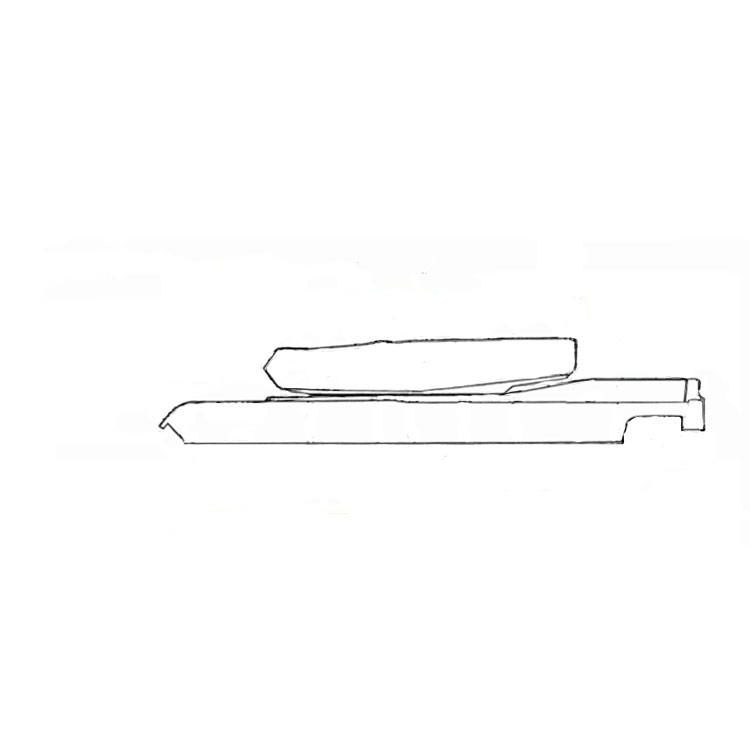
Draw an illustration of the tank. The turret of a military storage tank.
Next, let’s start attracting the container turret. To do this, draw a rectangular shape with a beveled rear end and round the front component of the turret, like in my drawing. Link the hull base summary to the turret and attract the tank’s artillery gun (cannon) using a ruler.

Step 4
Drawing the wheels in the caterpillar tracks.
Now we need to draw the wheels in the tracks, I have 5 of them aware, that is six, but the sixth wheel is smaller sized in size, and it offers to tension the way. First, draw the facility wheel. The line we drew earlier will separate it by fifty percent, including the other spins the same size as the facility wheel. Then you need to complete the mudguards (dust security) over the tracks. Bear in mind that to draw the storage tank correctly, you must keep the proportions and all the “little points”; otherwise, the storage tank will certainly not be believable.

Step 5
Gas tank, actions, and hatch.
At this step, we will include the drawing of the container, a gas tank, and actions for the vessels to climb right into the turret and ahead of the driver’s mechanic hatch, which changes the auto windshield of the container. I think you will not worry about these details, as all you need to do is carefully draw the turret.

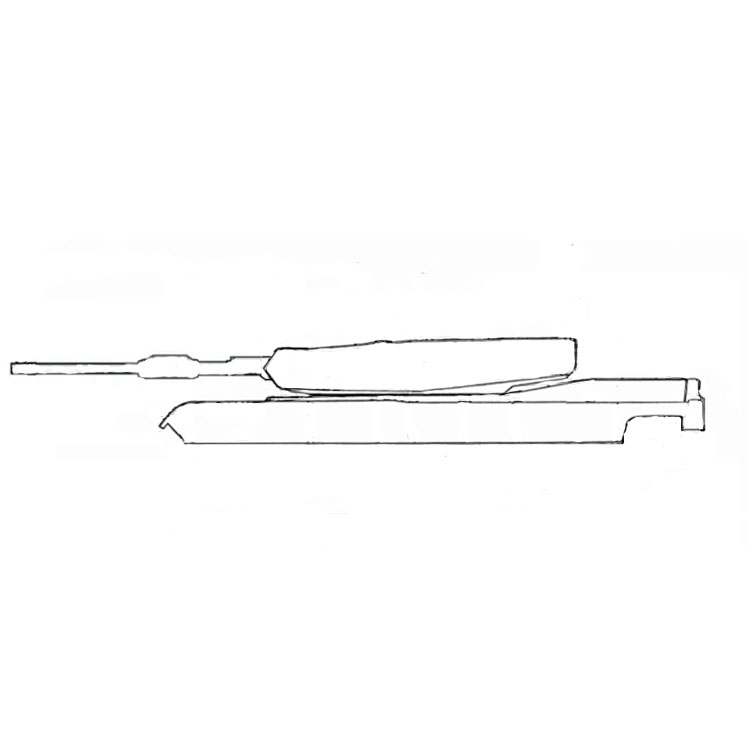
Step 6
Drawing the container’s turret carefully.
The frontal part of the turret is created to show coverings; that’s why its airplane is likely and rounded. This army trick maintains the tank from being struck head-on by a projectile. Pay one of the most interest to this element of the illustration, considering that the turret and cannon draw in the audience’s focus in the initial area. Attract the turret carefully, including the accessory of the gun to the turret. You could attract the weapon barrel of the storage tank a little thinner if you made a blunder with its diameter. Just eliminate the lines with an eraser and draw new ones under the ruler. Do not forget to attract the hatch cover on top of the turret.

Step 7
Drawing little details.
We are drawn to the container, and the following action is to draw various tiny details of the tank. First, attract the track carefully. After that surface attracting the information of the container wheels. To do this, include a stroke to the previous shapes of the wheels, draw a pin (axle) in the center of the wheel, and make the inner rim of the wheel. At the outside wheels draw teeth, these small wheels capture the track, and the tank is relocating. Specify in addition information hatch and see what else you can use the hull of the tank. Numerous vessels mounted additional fuel barrels on the hull.

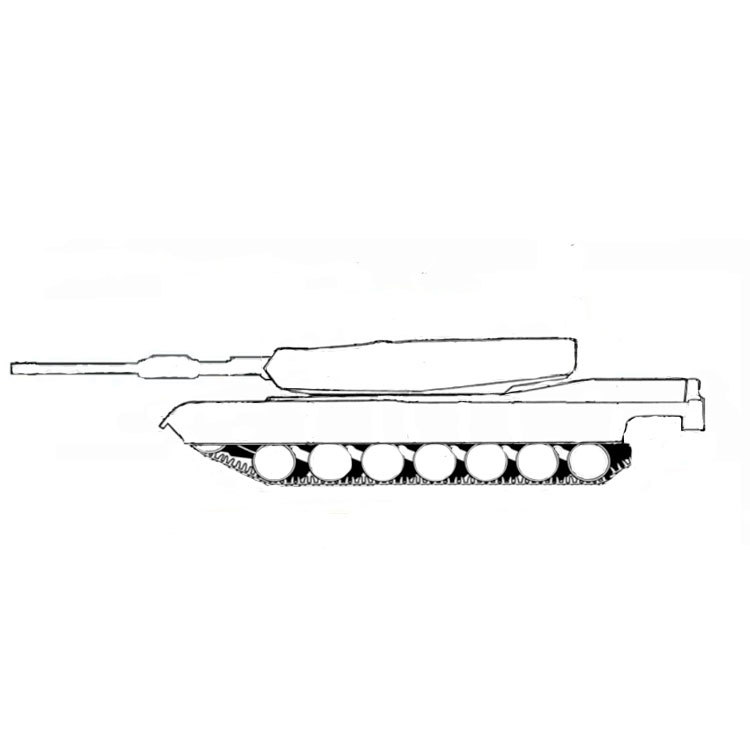
Step 8
The finishing touches to the illustration.
By this step, you should have attracted the container entirely, and it just remains to color the drawing of the storage tank with a soft, simple pencil. First off, shade the wheels, making them three-dimensional and more reasonable. Take more time for this step, draw nearly all the information on the weels, and carefully work out all the information. These details will make the illustration of the tank reasonable.


