How to draw an eye with a detailed description of drawing eyebrows is explained in this article! Ophthalmology—the science of the organ of vision (the eye—Latin oculus, Greek ophthalmos) and its diseases—originated in ancient times. The name and image of Pepi Ank Iri, one of the healers who treated eye diseases and lived in Egypt in the middle of the second millennium BC, have been preserved on a tombstone.
Written monuments of the ancient civilizations of Egypt, Babylonia, India, China, Greece, and Rome testify that even then, doctors and priests were familiar with eye diseases such as cataracts and lacrimal sac fistulas, as well as methods of treating them. During the heyday of Arab caliphates (9th-14th centuries), the first fundamental manuals appeared, summarizing the experience of outstanding Arab doctors of ancient medicine in the field of ophthalmology: “The Treasure of Optics” by Ibn al-Haytham (Alhazen) and “The Book of the Eye in 10 Discussions” by Hunayn ibn Ishaq.
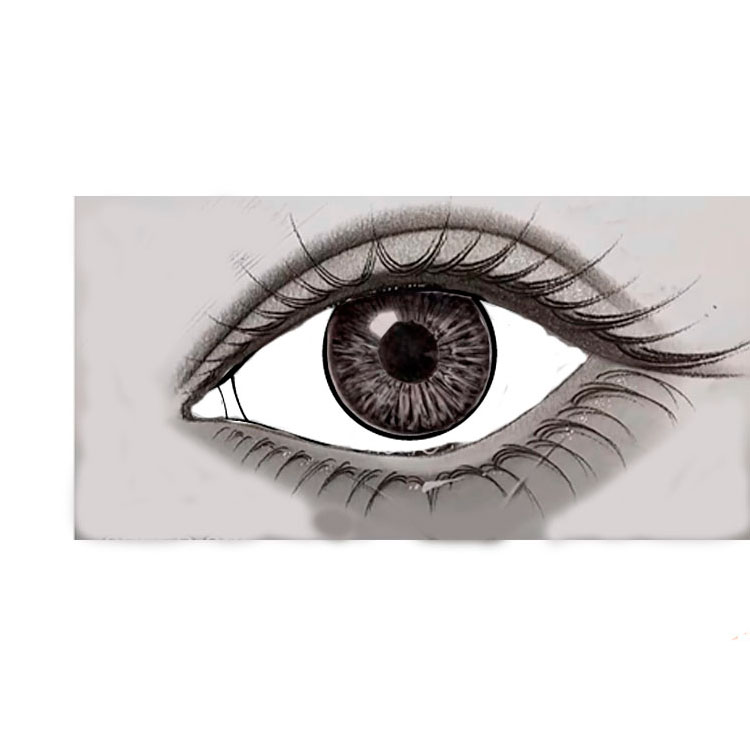
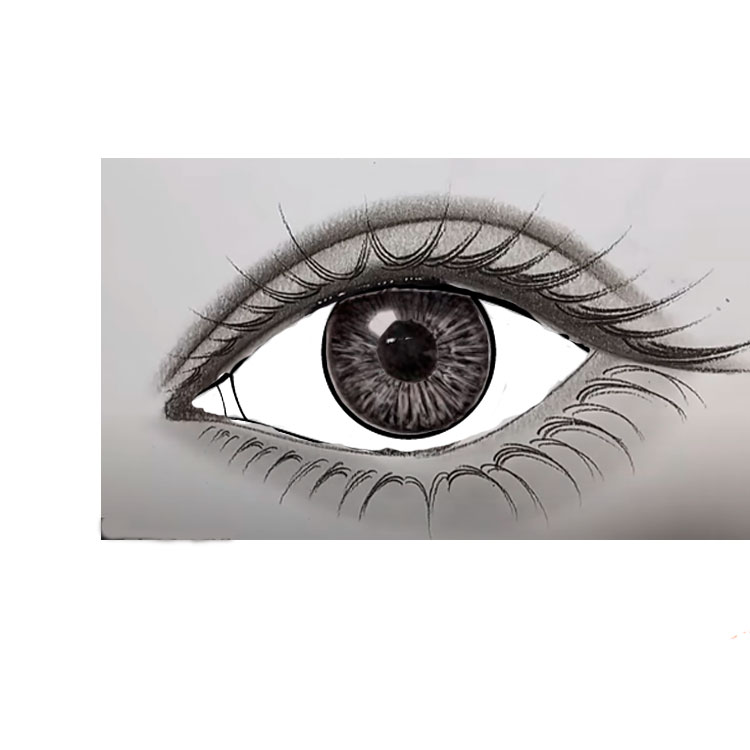
Structure of the eye.
1. Third eyelid (small protrusion in the inner corner of the eye).
2. Upper eyelid margin – movable part of the skin that protects the eyeball.
3. Glare.
4. Upper eyelashes – thin hairs growing from the outer edge of the upper eyelid.
5. Outer corner – the point where the outer edges of the upper and lower eyelids meet.
6. White of the eye – the visible part of the eyeball.
7. Iris – the round part of the eyeball surrounding the pupil.
8. Pupil – a dark, round formation inside the iris.
9. Lower eyelid margin – part of the skin fold that protects the lower part of the eyeball.
10. Lower eyelashes – thin hairs growing from the outer edge of the lower eyelid.

Drawing eyes is not an easy task, but in this article, we will try to present the material in a simple and understandable way! The Medical Canon, written at the beginning of the 11th century AD by the outstanding Persian philosopher, scientist, poet, and physician Ibn Sina (Avicenna), played a major role in the development of the science of the eye.
He succeeded in presenting the science of the eye of that era in the most complete and systematic form. For five centuries, the Canon was the most important guide for physicians. It was translated into Latin, and with the advent of printing, it underwent more than 30 editions.
In the Middle Ages, the authority of the great scientists of antiquity remained unquestioned, which is why medicine in Europe developed extremely slowly until the 18th century. During this period, the work of the outstanding astronomer Johannes Kepler, who laid the foundations of modern experimental optics by 1604, played a crucial role in the development of ophthalmological science.
The scientist was the first to consider the eye as an optical system that allows the retina to receive a reversed, reduced image of objects in the outside world. Kepler defined the essence of myopia and hyperopia and explained the action of not only positive but also negative lenses. The results of his research refuted the centuries-old misconceptions of scientists who claimed that the lens of the eye was the only organ of vision and light perception.
Let’s start drawing the eye right now!
How to draw an eye step by step
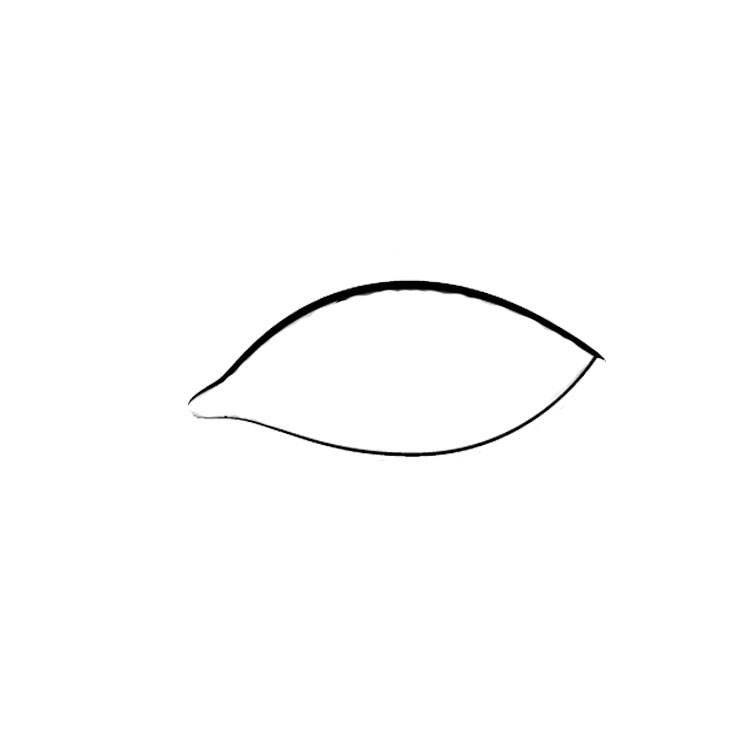
Step 1
The first step in drawing the eye is to draw the lower eyelid!

Step 2
Next, draw the upper eyelid!
Step 3
At this stage, we draw the iris!

Step 4
Next, draw the tear duct area!

Step 5
At this stage, we draw the pupil!

Step 6
We darken the iris (this was drawn by a professional, but you can draw it however you like—it’s not that difficult)!

Step 7
Here we draw the eye glare!

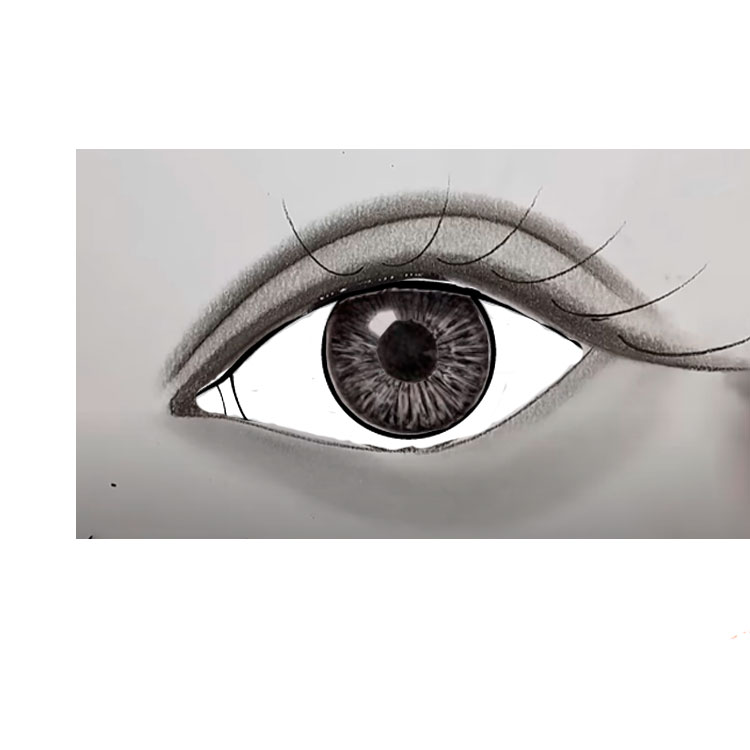
Step 8
At this stage, for the convenience of drawing eyebrows, we darken the eyebrow area!

Step 9
Right here, we draw the six main eyebrows of the upper eyelid!
Step 10
Draw 4 eyebrows on the left side as well!

Step 11
Finish drawing the bushy eyebrows on the upper eyelid on the right!

Step 12
Do the same thing on the upper eyelid with the eyebrows slightly to the left!

Step 13
Let’s make the eyebrows on the upper eyelid on the right side thicker!

Step 14
Do the same for the upper eyelid on the left!

Step 15
Start drawing the eyebrows on the lower eyelid as shown in the picture!

Step 16
On the lower eyelid, to the right, we create bushy eyebrows!

Step 17
Do the same on the lower eyelid on the left side!

Step 18
Let’s make the eyebrows on the lower eyelid more frequent!
Step 19
Finish the lower eyelid and draw the entire picture!