How to draw arms easy and in a few simple steps will be explained in this article! Understanding how to accurately draw the arms and the legs can dramatically improve your style sketches and give you a significant advantage in the awarding of your designs.
This is a simplified lesson on arms because you do not need to recognize how to draw anatomical arms for style method. Arms drawing are a simple and exciting activity! This lesson is divided into five parts in which you can learn to draw arms step by step, starting from the shoulder and ending with the drawing of each finger!
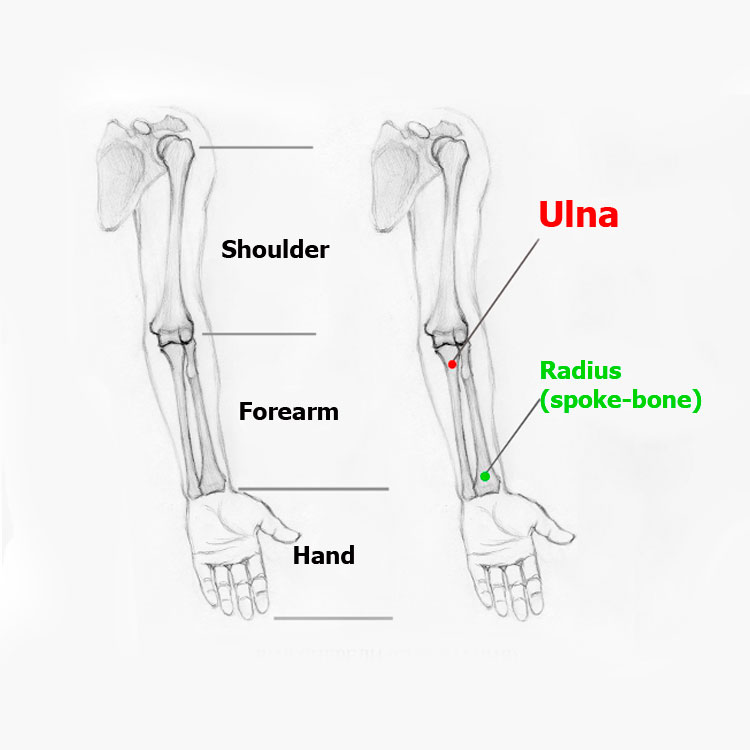
How to draw arms male and their constituent parts (muscle and bone elements)
The arm consists of three main parts:
- the upper arm;
- the forearm;
- the hand.
The forearm consists of two bones:
- the ulna (the bone at the elbow);
- the radius (the bone at the wrist).
You can also highlight the main bones in your arms:

Major muscles:
- deltoid muscle (lifts the entire arm);
- biceps (bends the arm at the elbow);
- triceps (extends the arm at the elbow);
- muscles responsible for the movement of the hand and fingers and the rotation of the forearm with the hand (pronation and supination).

The two main muscle groups of the forearm:
- on the lateral aspect of the humerus is muscle group (a), which includes the extensors of the wrist and fingers;
- on the medial aspect of the humerus is muscle group (b), which includes the flexors of the wrist and fingers;
- these two muscle groups are clearly visible and distinctly separated by the ulna.

How to draw arms in pencil

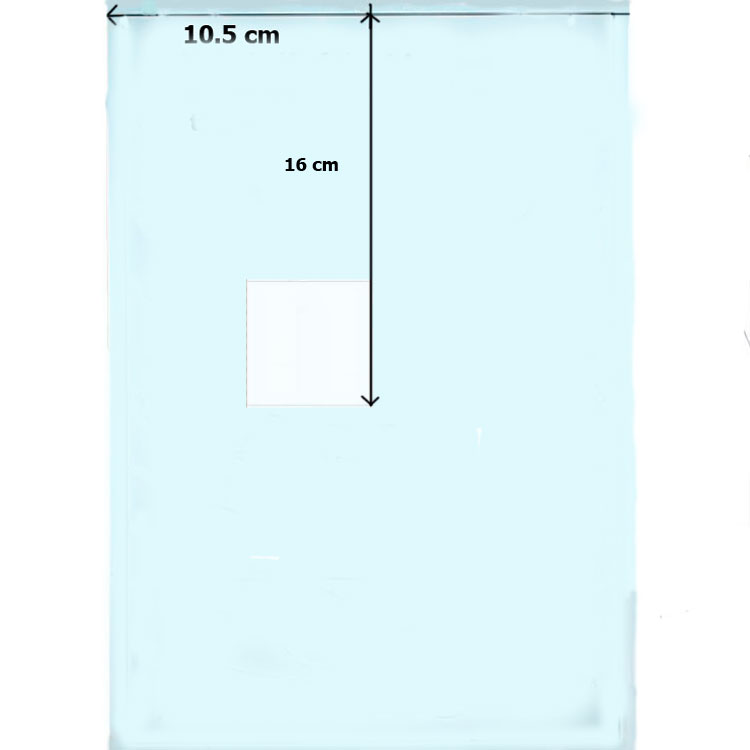
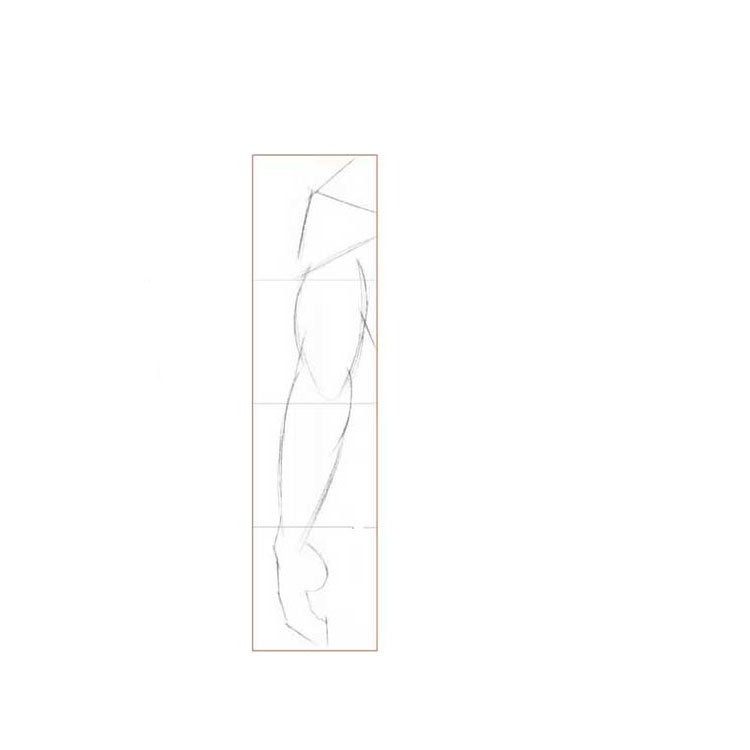
We’ll use 4 squares measuring 5 cm by 5 cm as the basis for our drawing! And these squares will be arranged vertically!
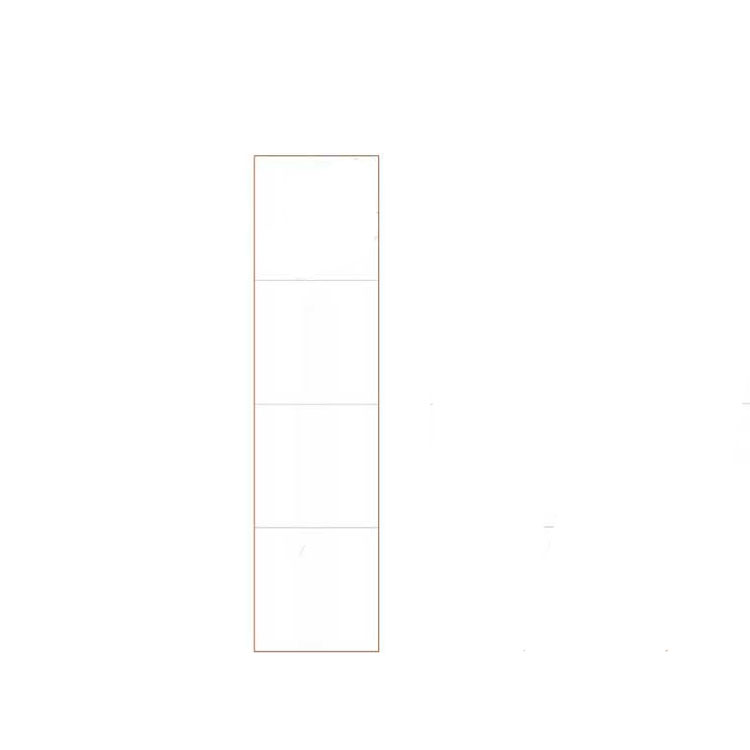
Step 1
For convenience, the first step in drawing a hand is to take an A4 sheet of paper and mark the center at 10.5 cm (this will be our starting point)!

Step 2
Next, 16 cm from the center (10.5 cm), we mark the center point where we will draw our first square!
Step 3
This square will measure 5 cm by 5 cm!
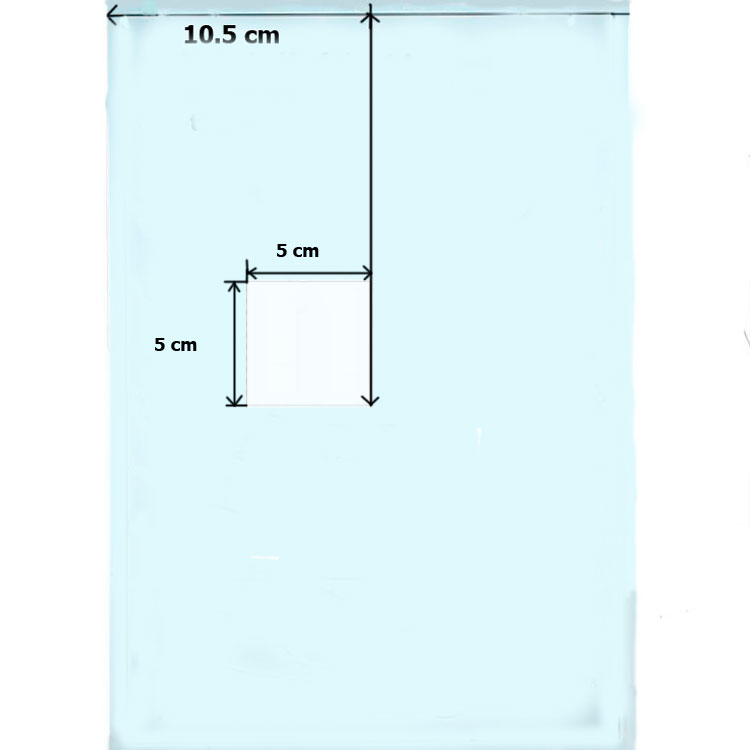
Step 4
Draw four squares of the same size, as shown in our sketch!

Step 5
In the upper right corner, we’ll start drawing the hand!
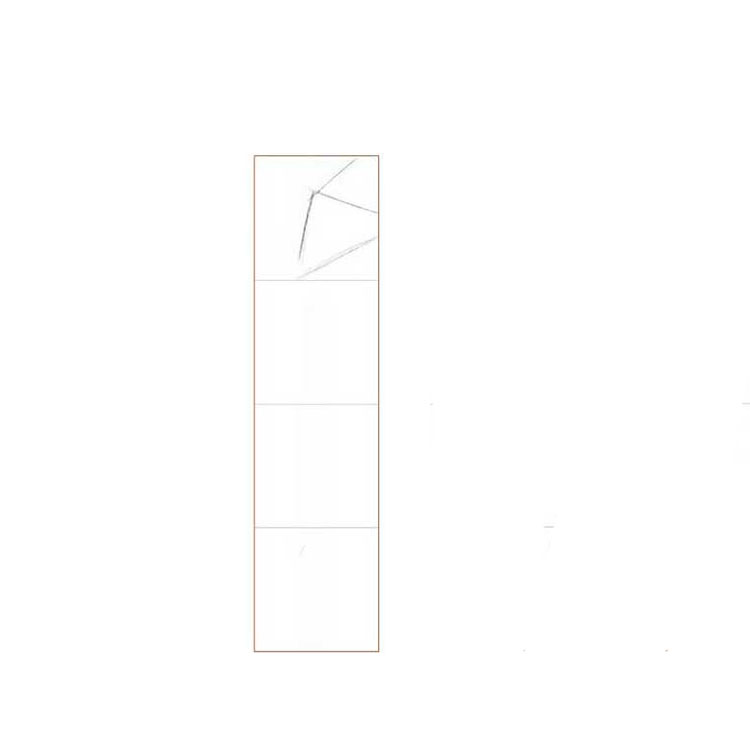
Step 6
Using the top two squares, we draw the outline of the shoulder and forearm!
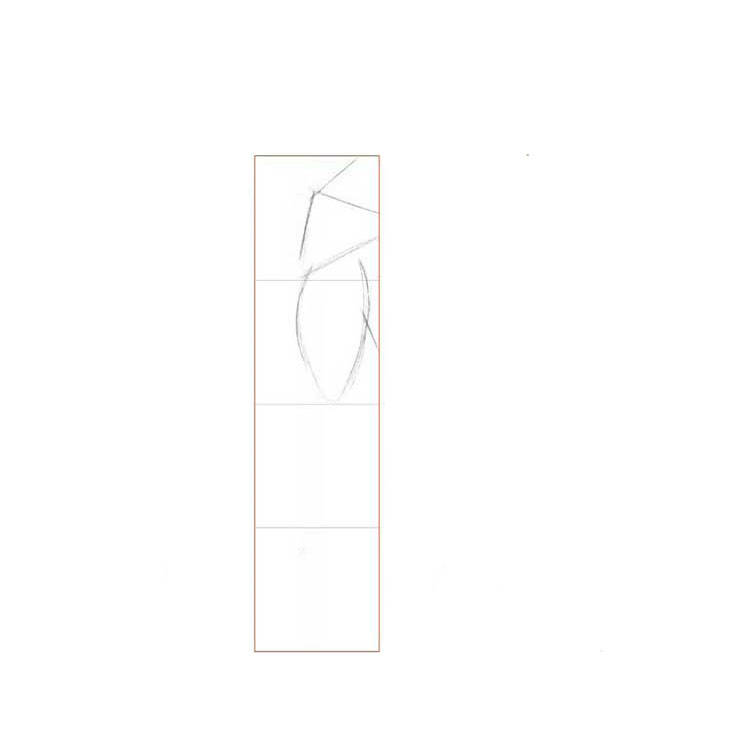
Step 7
Using the second square from the bottom, we draw the lower part of the arm!
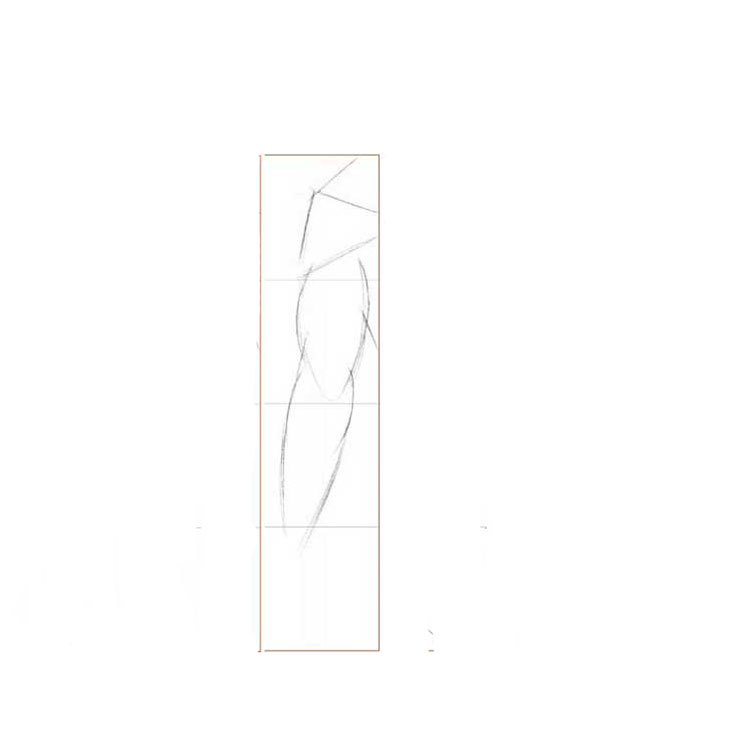
Step 8
And in this step, we’ll draw the outline of the hand and fingers!
Step 9
Let’s create more detailed elements for the fingers and the middle part of the hand!

Step 10
In this step, we’ll add detail to all four parts of the arm and trace them with a dark pencil!
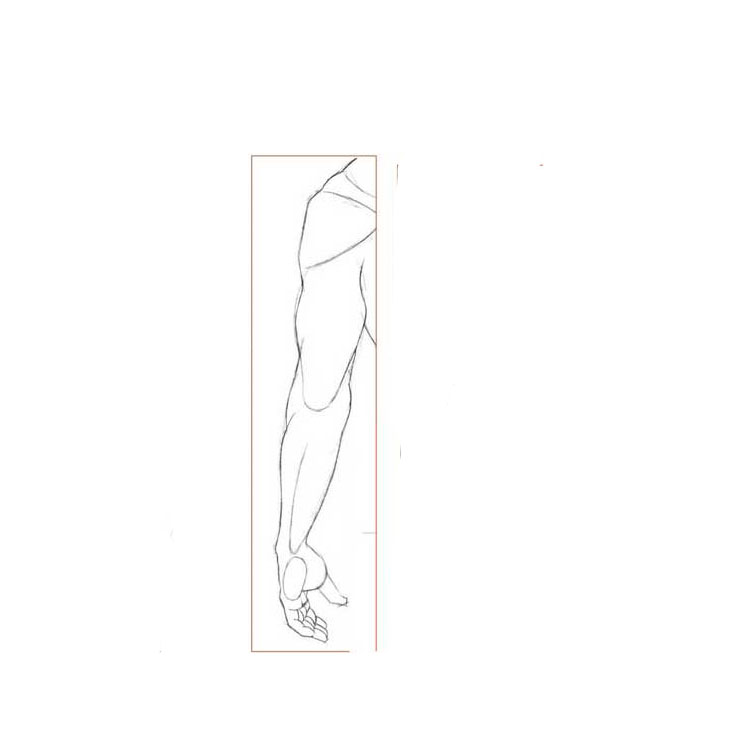
Step 11
These two pictures show, roughly, how to draw fingers!

Step 12
Draw the outlines of the muscles (triceps, etc.) in the same way!

Step 13
Let’s remove all the unnecessary elements and add some highlights and shadows!

Step 14
Pencil 2H and HB apply to shade, highlighting the main points.
 Step 15
Use pencil 2B and 4B to apply to cross-hatch, creating dark areas.
 Step 16
Apply to shade to the brush, then compare you with my drawing, correct the flaws.
How to draw arms fingers in different positions
Now let’s look at another example. This time, the individual parts on the side are highlighted in colour. Palm green square block. If you draw a line in the middle, you can easily hold your finger.

Then draw your thumb. Because it is an independent moving part, we will customize it for our colours. Draw the base of the thumb and start the first battalion in two circles. Remember that your fingers partially overlap when you draw your fingers. Here, for clarity, the thumb and middle fingers tend to tilt slightly somewhat. You can not see the top of your finger plate because your hand is not as flat as a piece of paper.
Then draw a brush on this rule again. It is better to start with the arm closest to us and work away. Of course, it is not necessary to draw a diagram where the brush is attached to the wrist. Use a light tap on the palm of your hand to indicate the shape.

You can also draw a small line in the middle of the palm towards the elbow. There are tendons; they are quite clear. This short line makes the picture more realistic.