Seashell drawing in 4 versions will be described in this article! Seashell (or molluscs) are the outer hard shells of snails of various shapes and contours. The shells of sea molluscs are a unique creation of nature. Since ancient times, they have attracted the attention of humanity. One cannot help but be amazed at the variety of shapes, colours, sizes.
Passionate Seashell collectors included Guy Julius Caesar, US President Abraham Lincoln, and famed writer Edgar Poe. It’s easy to draw a seashell, and just the main thing is to listen to us and repeat after us! People have been collecting seashell from ancient times for food, making fishhooks, arrowheads and other things from shells. The names “scoop” or, say, “lamp” preserve the memory of the sinks’ useful purposes.
Surprisingly, the strength of many of them, until recently, significantly surpasses everything created by man. It is provided by aragonite, a substance of organic nature with plates of calcium carbonate embedded in it, located perpendicular to the shell’s surface.
This “natural discovery” became the prototype for creating the most advanced materials used in weapons and missile technologies. Even in prehistoric times, seashell was exported far from their habitats, often becoming a symbol of wealth and high social status. Ethnographers count about 150 species of molluscs, the seashell of which served as money. This role was often played by representatives of the Cypraeidae family, better known as cowrie.
So let’s get down to drawing the seashell!
Seashell drawing easy (option 1)

Step 1
The first step in drawing a seashell is to create the top of the shell!

Step 2
Let’s draw the next curl of the shell!

Step 3
And draw the next curl of the seashell !

Step 4
At this stage, draw the lower part of the shell!

Step 5
And then the curly part of the seashell !

Step 6
Let’s finish drawing the right side of the shell!

Step 7
Let’s create the central part of the seashell !

Step 8
Let’s darken the top of the shell!

Step 9
Let’s also drawing the upper right part!

Step 10
Finish drawing the entire seashell by adding dark tones!
Seashell drawing simple (option 2)

First, draw two straight lines that go at 45 and -45 degrees, mark the seashells with dashes on top.

Draw the shells upward with a small wavy line, and draw its base at the bottom.

We need a ruler. Do not press hard on the pencil; lightly apply lines; their number does not have to coincide with mine, just along the contour, the distance between them should be approximately the same.


Hatch the dark areas.

We do shading from these dark areas on both sides with a slightly lighter tone, paint over the bottom.

Seashell line drawing (option 3)

For clearness, it is impossible not to consider this variant, so we will, in a similar way, learn how to draw a seashell. We start beside the surface area. Draw a triangular shape that resembles a nose. Above it, we make one more one in the form of a fishtail.

We limit it from below in the form of 5 flowers. They all have a ribbed framework, and from the inside, they radiate in various colours. The within the covering is smooth. Such surfaces in large quantities are tossed ashore.

At the suggestion of each, we make three serifs; on the centre part, we attract a strip with 2 serifs, and also, over it, we draw 3 vertical sticks. Draw a bend near the top, which is crossed by several serifs. On the trail itself, we make additional lines.
Seashell pencil drawing (option 4)

1
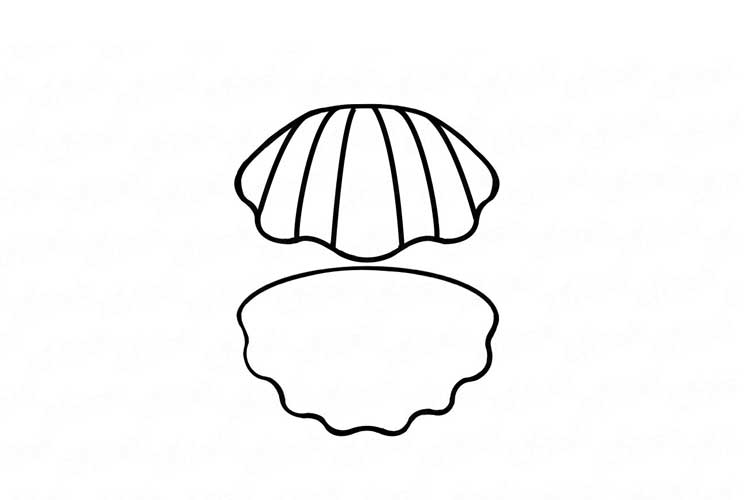
Shell base
We have a drawing tool on how to draw a closed shell. In this tutorial, draw an open one. We form it from two ovals.

They should be about the same size.

In shape, the lower one looks more like a triangle.

2
The edges
The shell is wavy at the edges.

Erase unnecessary lines to make the waves clear.

3
Top sash
There should also be wavy edges and vertical patterns here since the shell is slightly open, and we can see its upper part from the outside.

Erase unnecessary lines and details.
4
Pearl
Draw it inside with a small circle. It is perfectly flat, so use a pair of compasses or a round object of the correct size.

5
The volume inside the sink
Repeat the wavy outline inside the bottom flap.

6
Finishing touches
The top of the shell should cover half of the pearl.

7
Colouring
Paint the shell in light colours – pink, purple, blue. You can paint the pearl black or white.