Horse side view drawing in 3 options is described in this article! So, it is better to draw a horse in several stages to understand and understand all the nuances of its image. Among all the animals that live on our planet, perhaps, it was horses (or horses) that most of all influenced our history and the development of civilization as a whole.
The domestication of the horse by man was one of the most significant historical events. As soon as you start to carry out the given schemes on a piece of paper, you will quickly get a spectacular horse. Draw a horse side view is very simple, but follow our recommendations!
Since then, horses have entered our life and for many centuries, they have been faithful companions of man, being both a means of transportation (in those days when the human genius had not yet invented the first car) and a draft force and helpers in agricultural work and a formidable military force ( for centuries, it was the cavalry that was the most combat-ready part of the armies). About horses, these noble animals, our today’s article.
So let’s start drawing horse side view!
Horse side view easy (option 1)

Step 1
First, we draw the outline of one eye for our horse!

Step 2
Next, we draw the outline of the muzzle!

Step 3
In this step, we draw the outline of the ears and the second eye!

Step 4
Here we draw the neck and start drawing the body of our horse!

Step 5
At this important stage of drawing, we create the outlines of the central and rear parts of our luxuriant-maned horse’s body!

Step 6
And in this step, we draw simple outlines of the front legs without unnecessary details!

Step 7
And in this intermediate step, we create the outlines of the horse’s powerful hind legs.

Step 8
Erase the extra details around the front and back legs and draw a fluffy tail!

Step 9
Let’s start coloring the horse’s face and neck in bright colors!

Step 10
And at this stage of drawing, we color the central and rear parts of the horse’s body in bright brown colors!

Step 11
And to finish coloring the horse, we create a dark brown color for its front and hind legs and, of course, its tail!
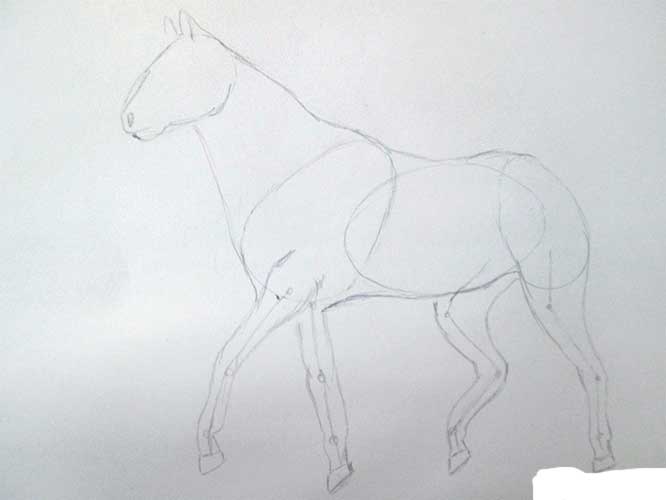
Horse side view Simple (option 2)

1. First of all, set the boundaries of the future drawing. The easiest option is to draw a rectangle where the animal will be immediately. It is very convenient to draw in this way.

2. Then draw the base of the future horse’s head. It is done like this: in the upper left picture, draw a medium-sized triangle. Its corners should be rounded. For clarity, the figure below is shown.

3. Now draw two ovals at an angle to each other. It is they who will later act as the basis of the animal’s chest and croup.

4. Connect these two ovals – as a result, you will get the horse’s belly. Avoid kinks and too sharp transitions; the lines should be smooth.

5. Next, we work on the image of the horse’s legs. First of all, mark with dots where their folds will be and connect with straight lines. Try to keep the proportions of the animal’s body harmonious. And consider the location of the horse’s knees – they are high. Pay attention to the picture.

6. Now, it is necessary to finish the legs, making them quite full and muscular and the hooves, which are depicted as a trapezoid. The knees of the animal protrude slightly forward; the heels are raised. For now, let’s draw the front legs.

7. Draw the horse’s hind legs. Keep in mind that they are much fuller than the front ones above the knee. If you make the back and front legs the same, you will get out of proportion.

8. Now proceed to the horse’s neck. It is essential to observe the golden mean here; only in this case, you will draw everything correctly. A skinny neck looks terrible in the picture, and a too massive thick neck also spoils the impression. It should be powerful enough, but at the same time, it conveys all the grace of the animal.
Draw with smooth lines, indicating, at the same time, the transition from the head to the body – make the neck gradually. It is better to make it slightly curved.

9. Draw the horse’s legs, head, neck and body again.
nine

10. Now, with the help of the eraser, delete all unnecessary lines that remain from the creation of the horse. They shouldn’t distract you. The lines must be washed carefully – without leaving marks and ugly streaks.

11. The time has come for the most exciting stage – we draw the horse’s head. In this image, the horse stands in profile towards the audience. Try to keep his face expressive. Draw the ears and highlight the large nostrils. Don’t forget to add volume to the horse’s eyes.
12. Next, draw the horse’s tail. There are many options: someone cuts their tails, intercepts with elastic bands or braids. In our case, the long and lush tail of an animal is presented, freely developing in the wind, making the image dynamic. It is immediately apparent that the horse is in motion.

13. Correct the drawing again – remove all unnecessary lines and strokes.

14. Carefully draw the horse’s muscles. Highlight them with strokes in the area of the front, back legs and neck. If you are not completely happy with the result, update the drawing lines with a pencil again. A horse with such muscles looks very powerful and realistic.
15. Now, we need to add to the horse a lush mane lifted by the wind. It is not necessary to display every curl or hair with particular zeal in the picture. It will be enough to outline the line of the mane simply. Make it voluminous and divide it into separate curls with a few strokes.

16. Draw a few more neat strokes to mark the joints’ folds on the animal’s legs.

17. Now, you can add volume to your drawing. To do this, use pencils and blend them. Take a close look at which areas of the horse are dark and which, on the contrary, are lighter. This can be seen in the figure below. Proceed in the same way.
Horse front view Step by Step (option 3)

Draw three egg-shaped ovals. 2 – small, at the sides. There is a larger oval between. The range between them is about the same. The very first oval is the head, and it is tilted 45 levels to the middle number.

Draw the 3rd one in between 2 egg-shaped ovals, it “goes,” both on one and also on the other number. This is the future body of the animal.
We note the place where the equine’s legs will undoubtedly be located and also attract them with damaged lines as if projecting where their folds will be.

Now it is effortless to make the legs voluminous and also at the same time attract an all-time low of the animal’s body.

Now we will find out exactly how to draw a horse’s head. We use the shape of our egg-shaped oval, taking into account the broad cheekbones of the animal and its nostrils. On top of the muzzle, we make two tiny ears on the crown.
We link the very first as well as a second oval with two curved lines; this is the powerful and long neck of the horse. Also, attract a rounded line from above, in between the second as well as 3rd ovals. This is the body of our trotter.
We remove all supporting lines. And we make the tail and hair of the equine, reveal the muscle mass lines on its body, and depict the nostrils and eyes on its face. The pencil drawing of the horse prepares.

The drawn steed turned out to be healthy and also gorgeous. It appears that if you enhance it, it will come to life. Well, allow’s attempt to do it. But first, we describe it with a tinted pencil.

It continues to be just to entirely decorate the picture and make the history, because we want our mustang, feeling a gust of wind, to be able to hurry right into the range.
Having discovered to represent an equine, we attempted to add character, love of rate, and liberty to his picture. It seems to work!


